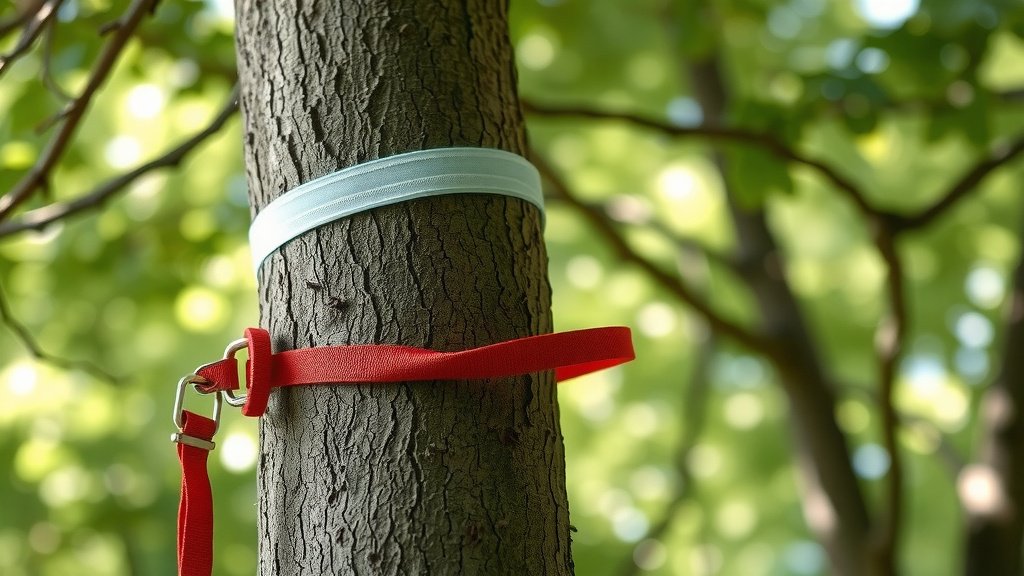
DIY Tree Straps: A Simple Guide for Secure Hanging
Making your own tree straps is surprisingly simple and cost-effective. You can easily create durable straps using common materials, saving you money compared to buying pre-made ones. This DIY approach gives you control over the size and strength of your straps for any purpose, like hanging hammocks or securing branches.
Many people wonder if they can really make their own. Yes, you absolutely can! This project is a fantastic way to get custom-sized straps perfect for your needs. It’s a great skill for campers, hikers, or anyone who enjoys spending time outdoors and wants reliable gear.
- You can make your own tree straps.
- It’s a budget-friendly DIY project.
- Use common, easy-to-find materials.
- Customize size and strength for your needs.
- Perfect for camping, hiking, or garden use.
Let’s walk through exactly how to make your own robust and reliable tree straps step by step.
Crafting Your Own Tree Straps: A Step-by-Step Guide
Making your own tree straps is a wonderfully practical skill. You can create exactly what you need without spending a fortune. This guide will walk you through the process, making it easy for anyone to get started. We’ll cover materials, tools, and assembly.
Essential Materials for Your DIY Tree Straps
Choosing the right materials is key to making durable and safe tree straps. You’ll want items that can withstand weight and outdoor conditions. Think about what the strap will be used for. This helps determine the strength and type of webbing you select. Learn more about protecting trees when hanging your hammock.
Choosing the Right Webbing
The core of your tree strap is the webbing. This is a strong, flat strip of woven fabric. For hanging heavy items like hammocks, you need heavy-duty webbing. Nylon or polyester webbing is a popular choice for outdoor gear. They offer excellent strength and durability.
Nylon webbing is known for its elasticity and abrasion resistance. Polyester webbing, on the other hand, has very little stretch. This can be a good thing for certain applications where you want less bounce. We found that for general use, like hammock camping, a webbing with a working load limit of at least 1,000 pounds is recommended (REI).
Webbing Width and Thickness
Webbing comes in various widths, commonly 1 inch or 1.5 inches. A 1-inch wide strap is often sufficient for many uses. If you’re planning to hang something very heavy or want extra peace of mind, consider 1.5-inch webbing. Thickness also matters. Thicker webbing generally means more strength. Look for webbing that feels substantial, not flimsy.
Selecting Your Hardware: Buckles and Rings
You’ll need hardware to connect your straps and attach them to your anchor points. This often includes buckles or D-rings.
Buckles provide a way to adjust the length of your strap. They can also offer a secure closure. Cam buckles or ladder-lock buckles are common choices. For a simple loop strap, you might use a buckle to create an adjustable loop.
D-rings are sturdy metal loops. They are excellent for creating fixed anchor points on your strap. Many pre-made tree straps use a combination of webbing and a buckle to form a continuous loop. You can also use two D-rings for a more traditional strap design. We found that stainless steel or powder-coated steel hardware is best for resisting rust.
Thread for Sewing
The thread you use is just as important as the webbing itself. You need a thread that is strong enough to hold the webbing together securely. Upholstery thread or heavy-duty polyester thread is a good choice. You want a thread that won’t easily break under stress.
Tools You’ll Need for Assembly
You don’t need a whole workshop to make tree straps. Most of the tools are common household items.
Sewing Machine or Hand-Sewing Supplies
A sewing machine will make the job much faster and create stronger stitches. If you have access to one, use it! A heavy-duty or industrial machine is ideal, but a standard home machine can work for lighter webbing if you use the right needle and settings.
If you don’t have a sewing machine, you can absolutely hand-sew your straps. It will take more time and effort, but it’s completely doable. You’ll need a strong, sharp needle and a thimble to help push it through the tough webbing.
Scissors and Measuring Tools
Sharp scissors are a must for cutting webbing cleanly. Fabric scissors work best. You’ll also need a measuring tape or ruler to ensure your straps are the correct length. A lighter or a sealing tool is useful for preventing the ends of synthetic webbing from fraying.
How to Make a Basic Adjustable Tree Strap
Let’s get down to building! This method creates an adjustable strap, perfect for hanging hammocks or securing gear.
Step 1: Measure and Cut Your Webbing
Decide on the length you need. A common length for hammock straps is 5 to 10 feet. Cut your webbing to the desired length plus about 8 inches for finishing. This extra bit allows for folding and sewing.
Step 2: Prepare the Ends
Synthetic webbing can unravel if you don’t seal the ends. Carefully use a lighter or a hot knife to melt and seal each cut end. Do this quickly and evenly to prevent a messy blob. This step is crucial for the longevity of your strap.
Step 3: Create the Buckle End
Take one end of the webbing. Fold over about 1 inch to create a hem. You want to create a loop that a buckle can pass through. If you’re using a cam buckle, thread the webbing through it now. Follow the instructions for your specific buckle. Generally, you’ll fold the webbing back on itself to create a secure loop.
Step 4: Sew the Buckle Loop
Securely sew the folded hem. If using a sewing machine, use a strong stitch like a zigzag stitch. Sew back and forth a few times to reinforce the area. This is where the strap will bear significant weight, so strong stitching is vital. If hand-sewing, use a backstitch for maximum strength, and make many passes.
Step 5: Finish the Other End
For the other end of the webbing, you’ll likely just fold over a small hem to prevent fraying. This end will pass through a D-ring or be tied directly. You can optionally add a D-ring to this end if your design requires it. Ensure all stitching is tight and secure.

Alternative: No-Sew or Minimal Sewing Methods
Sometimes you need a strap in a pinch, or you just don’t have a sewing machine. There are ways to create functional straps with minimal or no sewing required.
Using Only Buckles and Rings
You can create a strap by simply threading webbing through a buckle and a D-ring, and then threading the end back through the buckle. This creates an adjustable loop without any sewing. However, we found this method is generally less secure than sewn straps, especially for critical weight-bearing applications. It’s better suited for lighter tasks. Many experts advise against this for anything that could cause injury if it failed (Backpacking Light).
Knotting Techniques for Temporary Straps
Certain knots can create secure loops in webbing. For instance, a girth hitch or a bowline can create anchor points. These are useful for very temporary needs. Remember that knots can weaken the webbing slightly. They are also harder to adjust than a buckle system. Always test any knotted connection before trusting it with significant weight.
Checklist: What You Need for Your Tree Straps
- Heavy-duty webbing (nylon or polyester)
- Strong buckles or D-rings
- Heavy-duty thread (polyester recommended)
- Sharp scissors
- Measuring tape
- Lighter or heat sealer (for synthetic webbing)
- Sewing machine (optional, but recommended)
Conclusion
You’ve learned that crafting your own tree straps is a rewarding and accessible DIY project. You can easily make durable, custom straps using readily available materials and simple tools. Whether you’re a seasoned outdoors person or just starting, this skill offers cost savings and the satisfaction of creating your own gear. Now that you have the knowledge, it’s time to gather your supplies and start building. Your next outdoor adventure awaits with your brand-new, homemade tree straps!
Frequently Asked Questions
How long should my tree straps be?
The ideal length for your tree straps depends on your specific needs. For hanging a hammock, straps between 5 to 10 feet are common, offering plenty of adjustability for different tree sizes. For other uses, like securing gear, you might need shorter or longer lengths.
Can I really use a regular sewing machine for webbing?
Yes, you can often use a regular home sewing machine for webbing, especially for 1-inch widths. Use a sturdy needle designed for denim or leather, and a strong polyester thread. You may need to sew over the reinforced areas multiple times for extra durability.
What’s the difference between nylon and polyester webbing for tree straps?
Nylon webbing offers a bit of stretch, which can be forgiving and resistant to abrasion. Polyester webbing has very little stretch, making it more stable and less prone to UV degradation. For most hammock hanging, either works well, but consider polyester if minimal stretch is important.
Is it safe to use no-sew methods for tree straps?
No-sew methods using only knots or buckles can work for very light-duty tasks. However, for applications where safety is a concern, like hanging a hammock, we strongly recommend sewing. Knots can weaken webbing, and buckle-only systems can slip under heavy, dynamic loads.
How do I prevent the ends of my webbing from fraying?
After cutting synthetic webbing (like nylon or polyester), you must seal the ends. The easiest way is to carefully melt the edges with a lighter or a hot knife. Move the flame quickly across the cut edge to fuse the fibers together, creating a clean, non-fraying finish.