How to Set Up a Hammock Bug Net: Your Guide
Setting up a hammock bug net is a simple process that greatly enhances your comfort outdoors. You can typically hang your bug net in under 5 minutes with just a few basic steps. Most nets use a simple suspension system that attaches to your hammock’s ridgeline or directly to your suspension. This keeps pesky insects away while you relax or sleep.
Many campers and hikers agree that a bug net is a game-changer for enjoying hammocks in buggy environments. It’s essential for areas with mosquitoes, gnats, or no-see-ums. A good bug net ensures you can truly unwind without constant swatting. We found that the right setup makes all the difference for a peaceful outdoor experience.
- Hang your hammock first.
- Attach the bug net to the ridgeline.
- Secure the ends to your hammock suspension.
- Adjust for a snug fit.
- Enjoy your bite-free relaxation!
Ready to create your insect-free sanctuary? Let’s walk through exactly how to set up your hammock bug net step by step.
“`htmlSetting Up Your Hammock Bug Net with Ease
So, you’ve got your hammock, and you’re ready for some peaceful outdoor time. But wait, what’s that buzzing near your ear? Ah, the dreaded bugs. Don’t let them ruin your relaxation! Setting up a hammock bug net is actually quite straightforward. We found that with a few simple adjustments, you can create your own personal, bite-free oasis.
Understanding Your Bug Net’s Design
Most hammock bug nets are designed to work with your existing hammock setup. They often feature a long, tubular shape that drapes over your hammock. You’ll typically find a ridgeline that runs along the top, which is key for suspension. The ends might have elastic or drawstrings to help secure them. Knowing these basic parts will make the setup process much clearer.
The Role of the Ridgeline
The ridgeline is the backbone of your bug net’s suspension. It’s a sturdy cord that runs from one end of the net to the other, usually on the top. This line is designed to attach to something above your hammock. Think of it like the top bar of a tent – it gives the net its shape and keeps it taut.
Securing the Ends
While the ridgeline keeps the top of the net open, the ends need to be secured. Many nets come with integrated shock cords or straps. These are meant to connect to your hammock suspension system. Some designs might suggest attaching them to your tree straps or even directly to the hammock carabiners. This closure prevents bugs from crawling in from the sides or underneath.
Step-by-Step Installation Guide
Let’s get this bug net installed! We’ve broken it down into simple, actionable steps. Remember, patience is your friend here. A few extra seconds can make all the difference for a secure and effective setup.
Step 1: Hang Your Hammock First
This might sound obvious, but it’s essential. Your bug net needs something to hang over. So, first, properly hang your hammock according to its instructions. Ensure it’s at a comfortable height and tension. We found that a slightly higher hang can sometimes make net attachment easier.
Step 2: Position the Bug Net
Carefully drape the bug net over your set-up hammock. Make sure the ridgeline is centered and running along the top length of your hammock. The net should hang down evenly on both sides. Try to avoid letting it get twisted as you position it.
Step 3: Attach the Ridging Suspension
This is where your bug net connects to the support system above. You’ll need to attach the ridgeline of the bug net to your hammock suspension. Many nets have loops on the ridgeline itself. You can often use carabiners, cordage, or the net’s own integrated suspension to connect these loops to your hammock’s ridgeline. If your hammock doesn’t have a ridgeline, you might connect the bug net’s ridgeline directly to the tree straps or suspension system above your hammock. We found that using a separate ridgeline for the bug net, suspended between the trees, offers the best separation and stability. This keeps the net from sagging into your face.
Options for Ridging Suspension
Different nets offer different solutions. Some come with their own thin cord. Others rely on you to use extra cordage or even small carabiners. If your net didn’t come with clear instructions for this part, consider using a lightweight cord like paracord. Tie it securely through the loops on your bug net’s ridgeline, then suspend it between your suspension points. Many experts suggest aiming for a taut ridgeline to give the net a good shape (REI).
Step 4: Secure the Net’s Ends
Now, let’s tackle the bottom. You need to close off the ends of the net. Look for the elastic cords, drawstrings, or straps at the foot and head ends of your bug net. These are designed to cinch down. Attach them to points on your hammock’s suspension. This might be the main suspension straps, carabiners, or even toggles on your hammock itself. The goal is to create a seal. We found that a snug fit here is key to keeping those tiny no-see-ums out. If there are gaps, bugs can find their way in.
Tips for a Tight Seal
Getting a good seal is all about tension. Pull the cords tight enough to close the opening, but not so tight that they strain your hammock or suspension. Experiment with where you attach the cords. Sometimes attaching them a bit lower on your tree straps works best. If your net has a lot of extra material at the ends, you might need to adjust how you’re attaching it to get it to lie flat against the ground or your suspension.
Step 5: Make Final Adjustments
Once everything is attached, it’s time for a final check. Get inside your hammock (carefully!) and see how the net feels. Is it sagging into your face? Are there any obvious gaps? You might need to adjust the tension on the ridgeline or the end attachments. We found that a quick wiggle test inside the hammock is the best way to identify any potential entry points for insects.
Common Issues and Fixes
The most common issue is the net sagging in the middle, right where your face is. This usually means the ridgeline isn’t taut enough, or it’s not suspended high enough. Another problem can be gaps at the bottom. If you can’t get a good seal with the built-in cords, consider using a small bungee cord or a longer piece of cordage to create a more secure closure. Sometimes, simply repositioning your hammock slightly can give you better anchor points for the net’s ends.
A Quick Checklist for Success
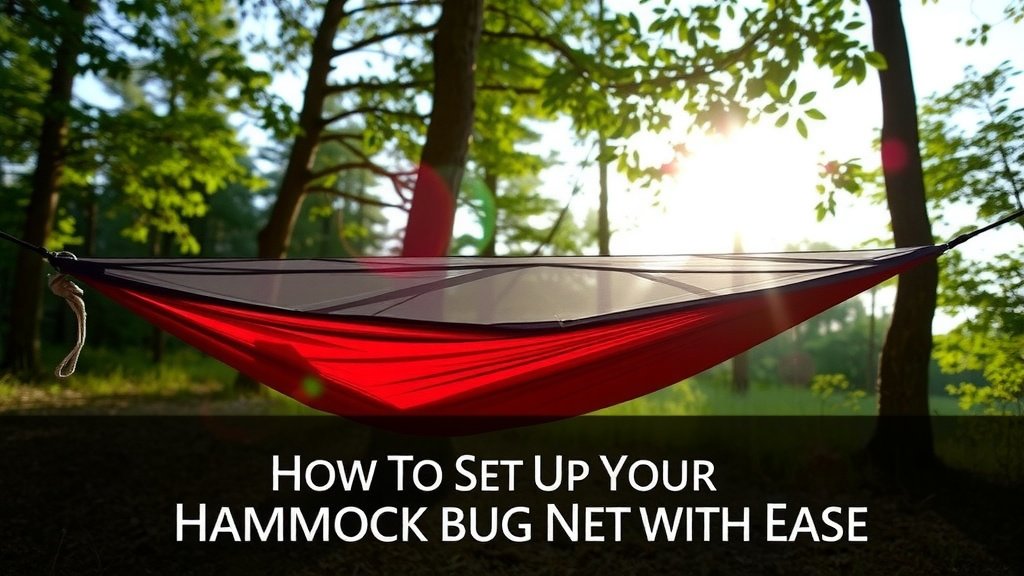
Before you settle in, run through this quick checklist to ensure your bug net is perfectly set up:
- Hammock is hung and stable.
- Bug net is draped evenly over the hammock.
- Ridgeline is suspended tautly above the hammock.
- Net ends are securely attached and sealed.
- No major sags or gaps are visible.
- A quick test inside confirms comfort.
Conclusion
You’ve now seen how setting up a hammock bug net is a straightforward way to protect yourself from annoying insects. By following these simple steps—hanging your hammock, positioning the net, securing the ridgeline, and sealing the ends—you can create your personal, bite-free haven. Remember to make those final adjustments inside your hammock to ensure a snug fit and no gaps. With your bug net properly installed, you’re ready to relax outdoors without the constant buzz and bites. Now, go hang your net and enjoy the peace and quiet!
Frequently Asked Questions
Do I need a bug net for every hammock camping trip?
Not necessarily. If you’re camping in an area known for biting insects, like mosquitoes or gnats, a bug net is highly recommended for comfort. For drier, cooler climates with fewer bugs, you might be able to get away without one, but it’s always good to be prepared.
What’s the difference between a bug net and a tarp?
A bug net is designed specifically to keep insects out, offering ventilation while blocking pests. A tarp, on the other hand, is primarily for rain and wind protection and doesn’t offer ventilation or insect barriers on its own. Many campers use both for complete protection.
Can I use my bug net with a different brand of hammock?
Generally, yes. Most hammock bug nets are designed to be universal and work with various hammock brands and suspension systems. The key is to ensure you can properly attach the net’s ridgeline and secure its ends to your setup.
How do I prevent the bug net from sagging into my face?
A sagging bug net is usually due to a loose ridgeline. Ensure your bug net’s ridgeline is suspended tautly between your anchor points, ideally above your hammock. Adjusting the tension on the ridgeline or slightly repositioning your hammock suspension can help lift the net.
What if my bug net doesn’t have clear attachment points for the ends?
If your net lacks specific loops or cords for the ends, you can often improvise. Look for sturdy points on your hammock suspension system, like your tree straps or carabiners, and use extra cordage or small bungee cords to cinch the net closed. Experiment to find the most secure and bug-proof attachment method.