How to Set Up a Hammock with a Tarp: A Simple Guide
Setting up a hammock with a tarp is a fantastic way to create a comfortable and protected outdoor sleeping setup. The basic idea involves using your hammock suspension and the tarp’s guy lines to create a waterproof shelter above your hammock. Many campers find this setup offers a great balance of comfort and protection from the elements.
Beyond just staying dry, a well-pitched tarp can also shield you from wind and even provide a bit of privacy. It’s a key skill for any hammock camper who wants to enjoy the outdoors in various weather conditions. We’ve found that a little practice goes a long way in perfecting your setup.
- Use your hammock suspension and tarp guy lines.
- Pitch the tarp to provide cover from rain and wind.
- Practice makes perfect for a reliable shelter.
- Enjoy comfortable camping in more weather.
Ready to learn how to get your hammock and tarp perfectly set up? Let’s walk through the process step by step.
Your Hammock Tarp Setup Guide
Setting up a hammock with a tarp creates a cozy, dry haven. It protects you from rain and wind. This guide will walk you through the process simply. You’ll be sleeping soundly under the stars (or clouds!) in no time.
Essential Gear for Your Tarp Setup
Before you can set up your tarp, you’ll need the right gear. We’ve found that having these items ready makes the whole process smoother. It’s like packing for a picnic – you don’t want to forget the napkins!
The Hammock Itself
Obviously, you need your trusty hammock. Make sure its suspension system (straps, whoopie slings, carabiners) is in good shape. This is what connects you to the trees.
The Tarp and Its Accessories
You’ll need a camping tarp. Many hammocks come with a dedicated tarp, or you can buy one separately. Rectangular tarps are common, but hexagonal or catenary-cut tarps offer great coverage too. Your tarp should come with guy lines. These are the ropes used to stake out the tarp. You’ll also need stakes to secure the guy lines to the ground.
Tree Straps or Rope
To hang your hammock, you need a way to attach it to trees. Tree straps are highly recommended. They protect the tree bark. Rope can work, but use it carefully. Many experts suggest using straps to **minimize tree impact**.
Optional but Handy Items
A ridgeline is a rope strung between two trees. It supports your tarp. Some people use a separate ridgeline, while others integrate it with their hammock suspension. Cordage for extra tie-outs is also useful. A ground tarp under your setup can add an extra layer of protection.
Choosing the Right Location
Where you set up is key to a successful night’s sleep. You want a spot that offers a few things. Think of it as finding the **perfect nook** in nature.
Tree Selection is Crucial
Look for two sturdy trees. They should be about the distance of your hammock apart. Ensure they are healthy and alive. Avoid dead trees or those with visible damage. You want trees that can **support your weight and the tarp’s tension**.
Ground Conditions Matter
Check the ground around your chosen spot. Is it relatively flat? Are there rocks or roots where you’ll be sleeping? You’ll want a comfortable spot to pitch your tarp’s guy lines. Look for areas where you can **easily drive stakes** into the ground.
Consider Wind Direction
Try to orient your tarp so it shields you from the prevailing wind. This can make a big difference in comfort. Think about where the wind typically blows in your camping area. A little **pre-planning saves a lot of discomfort** later.
Step-by-Step Hammock Tarp Setup
Now for the main event! This is where you bring your campsite together. Follow these steps for a **secure and dry shelter**.
1. Hang Your Hammock
First, set up your hammock between the two trees. Use your tree straps or rope. Adjust the height so it’s comfortable for you. You want it to have a nice, gentle sag. This **sag is important for comfort** and proper tension.
2. Position Your Tarp
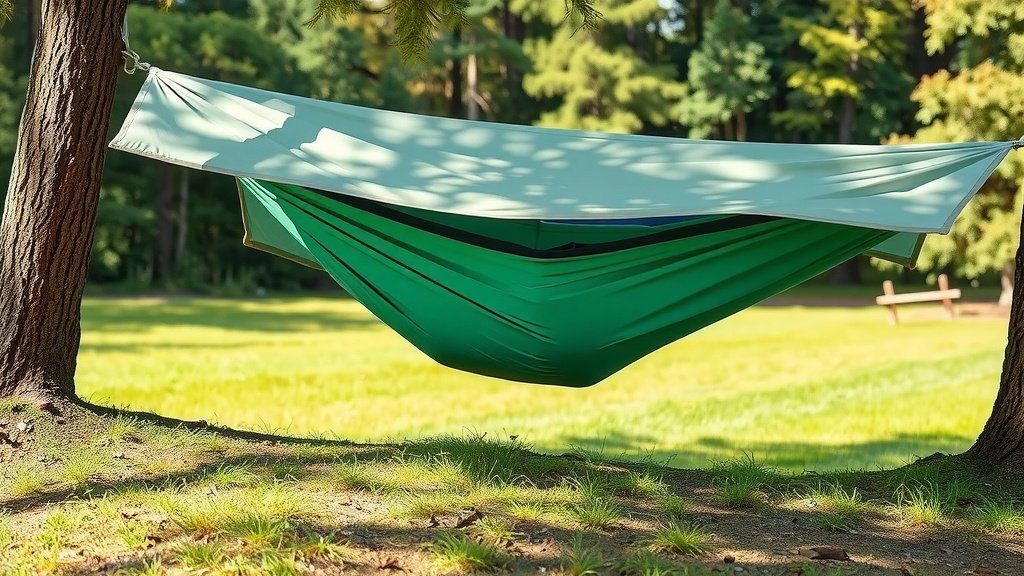
Lay your tarp out. Decide which side will be the “weather side” (facing the wind or rain). Center the tarp over your hammock. You can either string a ridgeline first, or attach the tarp directly to the tree straps or suspension. Many people find using a ridgeline makes tarp setup **much easier and more consistent**.
3. Secure the Ridgeline (If Using One)
If you’re using a separate ridgeline, string it between the two trees, above where your hammock hangs. Attach the grommets or loops on the tarp to this ridgeline. Use carabiners or toggle loops. Make sure it’s taut enough to **support the tarp’s shape**.
4. Stake Out the Tarp Corners
Now, pull the corners of your tarp out away from the center. Use the tarp’s guy lines. Connect them to the grommets or loops at the corners. Stake these guy lines securely into the ground. Aim for a **45-degree angle** from the corner of the tarp to the stake. This creates tension and a good pitch.
5. Adjust for Optimal Coverage
Check your tarp’s pitch. Are there any sagging areas? Are the sides low enough to block wind and rain? Adjust the guy lines as needed. You want a **drum-tight setup** if possible. This prevents water from pooling. It also makes your shelter more wind-resistant.
Common Tarp Pitches
There are several ways to pitch your tarp. The most common is the “A-frame” or “diamond” pitch. Another popular one is the “tarp tent” or “porch” mode, which offers more side protection. Experiment to see which works best for your tarp and **your comfort needs**.
| Pitch Style | Description | Best For |
|---|---|---|
| A-Frame | Tarp folded in half, creating two sloping sides like a tent. | Simple setup, good rain protection. |
| Diamond | Tarp spread out flat, with corners pulled out. Offers more ventilation. | Dry, calm weather. Easy access. |
| Porch/Tarp Tent | One side is pitched higher, creating a sheltered “porch” area. | Windy or rainy conditions, extra gear storage. |
Quick Checklist for Your First Setup
Here’s a quick rundown to ensure you have everything:
- Hammock and suspension ready?
- Tarp, guy lines, and stakes?
- Tree straps or suitable rope?
- Sturdy trees selected?
- Ground clear and ready?
- Practice pitch in your yard!
Conclusion
You’ve learned the essentials for setting up a comfortable hammock with a protective tarp. Remember, choosing the right spot and practicing your pitch are key. This setup offers a fantastic way to stay dry and comfortable, no matter the weather. With a little practice, you’ll be a pro at creating your own cozy outdoor shelter. Now, go out there and test your new skills on your next adventure!
Frequently Asked Questions
How tight should my tarp ridgeline be?
Your tarp ridgeline should be taut enough to support the tarp’s shape without sagging. You want it firm, but not so tight that it stresses your anchor points. A good ridgeline is essential for a well-pitched tarp.
What’s the best way to stake out tarp corners?
Stake out your tarp corners at a 45-degree angle away from the tarp’s edge. This angle creates good tension and prevents the stakes from pulling out easily. Make sure the ground is firm enough to hold the stakes securely.
Can I use my hammock suspension to hang the tarp too?
Yes, some hammock setups allow you to integrate the tarp suspension with your hammock suspension. Many people find using a separate ridgeline for the tarp offers more adjustability and easier setup. It really depends on your specific gear.
How do I prevent water from pooling on my tarp?
Water pools when your tarp has sagging spots. Regularly check your tarp’s pitch and adjust the guy lines to ensure it’s drum-tight. A good pitch means water runs off quickly instead of collecting.
What if I can’t find two perfect trees the right distance apart?
If your trees are too far apart, you can use a longer ridgeline or adjust your tarp pitch to compensate. For trees too close, you might need to angle your hammock or adjust the tarp to create enough coverage. Sometimes, you might need to find a different spot.