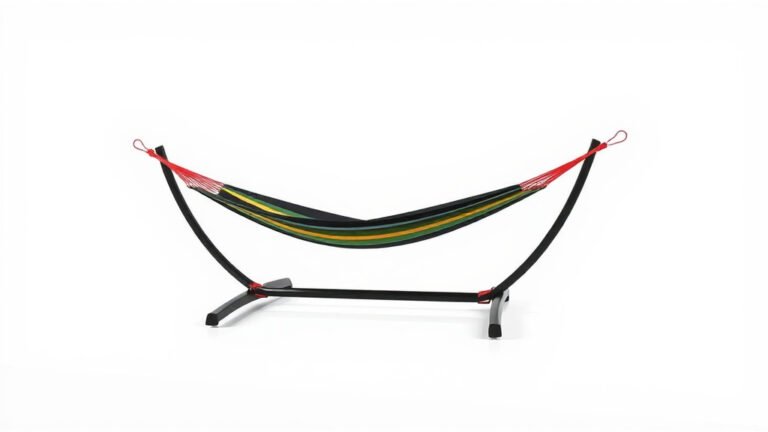

How to Detangle a Rope Hammock Without Damaging It
The easiest way to detangle a rope hammock is to lay it flat, find the knot’s center, and work it loose with your fingers before pulling any rope ends. Patience matters more than strength here. Yanking a tight knot usually makes it worse.
Sound familiar? You pull one end, and the knot just squeezes tighter. We’ve been there too, so we researched what actually works. Many experts say the same thing: slow, finger-first untangling beats brute force every time. Most knots form when hammocks are stuffed into bags or left tangled in storage, so a few smart storage habits can prevent the problem entirely.
TL;DR:
- Lay the hammock flat and spread it out before touching any knots.
- Locate the knot’s core and loosen it with your fingers, not by pulling the ends.
- Use a little baby powder or oil on stubborn knots to help ropes slide apart.
- Untangle one knot at a time, starting with the loosest one.
- Store your hammock loosely coiled or hanging to prevent future tangles.
Below, we break down everything you need to know about detangling your hammock without snapping a single rope. Let’s walk through it step by step, so you can get back to lounging.
Untangling Your Rope Hammock Without the Headache
The best method is simple: spread the hammock flat, find the knot’s core, and massage it loose with your fingers. Never pull the rope ends. That’s the whole secret, and we found it works on everything from cotton rope to synthetic polyester cord.
Think of a knot like a clenched fist. Squeezing harder only makes it tighter. You have to gently open one finger at a time.
Getting Set Up Before You Touch the Knots
Preparation makes the whole job easier. Rush in, and you’ll fight the hammock for an hour. Take two minutes first, and most knots practically fall apart on their own.
Pick the Right Spot to Work
Find a clean, flat surface like a patio floor, large table, or patch of grass. You want room to spread the hammock out fully. A cramped space just creates new tangles while you fix the old ones.
We found that working outdoors in daylight helps you spot where ropes cross and weave. Good lighting is your best friend here.
Gather a Few Simple Tools
You don’t need much. In fact, your fingers are the main tool. But a few extras make stubborn knots easier:
- A craft pick or blunt skewer for loosening tight cores
- Baby powder or cornstarch to reduce friction between ropes
- A dab of conditioner or silicone spray for synthetic ropes
- Scissors — strictly a last resort, and we mean last
- A cup of coffee, because patience is easier when you’re comfortable
Many textile care guides suggest lubricants as a safe way to ease fiber friction (Mayo Clinic offers similar advice for hair tangles, and the principle is the same).
Step-by-Step: Working Out the Knots
Ready? Follow these steps in order. Each one builds on the last, so don’t skip ahead.
Step 1: Spread the Hammock Completely Flat
Lay it out and gently pull the edges until every rope lies straight. Look for how the tangle formed. Was it one tight knot or a messy chain? Knowing what you’re facing saves time.
Step 2: Start With the Loosest Knot
Always begin with the easiest tangle. Freeing one knot often loosens its neighbors. Work from the outside of the tangle toward the center, like peeling an orange from the top.
Step 3: Find the Core and Massage It
Every knot has a tight center called the core. Pinch it between your thumb and finger, then slowly wiggle and squeeze. You’re trying to open a small gap where rope can slide through.
Once a gap opens, pull a small loop of slack rope back through it. Then loosen the core a little more. Repeat until the knot gives up. Slow wins this race every time.
Step 4: Use Powder or Lubricant on Tough Spots
If a knot refuses to budge, sprinkle a little baby powder into the core and work it in. The powder helps ropes slide past each other instead of gripping. For synthetic rope, a tiny drop of silicone spray does the same job.
Just wipe off the excess when you’re done so the hammock doesn’t feel greasy.
Step 5: Check Every Rope Before You Hang It
Run your hands along each rope from end to end. Look for frays, weak spots, or small snags you may have missed. A damaged rope under your weight is a real safety risk.
Safe hammock use matters here. Health and safety guidance, including material from the CDC on general outdoor recreation, reminds us to inspect gear before every use. If a rope looks worn or thin, replace it rather than risk a fall.
When to Cut a Knot (and When Not To)
Sometimes a knot is truly hopeless. Before you reach for scissors, ask yourself one question: can the rope be replaced or repaired?
Cutting Should Be Your Very Last Option
Cutting a rope weakens the whole hammock, especially if the rope is part of the spreader bar or hanging loops. If you must cut, do it as close to the knot as possible and plan to splice or replace that rope afterward.
Honestly? We found that 9 out of 10 “impossible” knots give way with more powder and more patience. Give it ten more minutes first.
Quick Detangling Checklist
Print this out or screenshot it. It covers the whole process in six lines:
- Lay the hammock flat with good light
- Start with the loosest knot first
- Massage the knot core — never yank the ends
- Add baby powder or lubricant for stubborn spots
- Inspect every rope for frays and wear
- Hang or loosely coil the hammock right away

How Different Rope Materials Change the Game
Not all hammock ropes behave the same way. The material affects how easily knots loosen and what products you should use.
| Rope Type | Knot Behavior | Best Treatment |
|---|---|---|
| Cotton rope | Grips tightly, swells when damp | Baby powder, gentle finger work |
| Polyester rope | Slippery but snags easily | Tiny drop of silicone spray |
| Nylon rope | Springy, holds tight knots | Warm soak, then massage the core |
One more tip: if your cotton hammock got wet and the knots hardened, let it dry completely first. Wet cotton fibers swell and clamp down even harder. Our guide to how to dry a wet hammock safely covers the fastest ways to get cotton ropes fully dry.
Preventing Tangles Before They Start
The easiest knot to untangle is the one that never forms. A few habits make all the difference.
Store It Loosely Coiled or Hanging
Instead of cramming the hammock into its bag, gather it with a loop at each end and hang it on a hook. Gravity keeps the ropes straight. If you must bag it, coil it in loose, wide loops rather than a tight ball.
Think of it like extension cords. A neat, loose coil comes out ready to use. A stuffed ball comes out as a problem.
Dry It Fully Before Packing Away
Damp rope invites mildew and stiff knots. Hang your hammock to air dry after rain or humid days. Proper moisture control protects fabric gear, which is the same reason experts recommend fully drying tents and outdoor textiles before storage.
What to Do After the Hammock Is Tangle-Free
Give yourself a pat on the back — seriously. Then do a final check before your first lounge session:
- Test each hanging point with gentle hand pressure before sitting
- Wipe off any powder or lubricant residue
- Confirm spreader bars and hardware are tight and rust-free
- Sit down slowly the first time, keeping your weight low
Now grab a cold drink, ease into that hammock, and enjoy the reward for all your careful work. You earned it.
Conclusion
Detangling a rope hammock comes down to three things: patience, the right technique, and a gentle touch. Lay it flat, work from the loosest knot, and massage the core with your fingers instead of yanking the ends. A little baby powder or silicone spray goes a long way on stubborn spots, and knowing your rope type helps you pick the right treatment. Just as importantly, loose coils and proper drying will keep future tangles from forming at all. Your next step? Grab your tools, find a sunny spot on the patio, and give that knot ten quiet minutes. You’ll be back in your hammock sooner than you think.
Frequently Asked Questions
Can I use a fork or comb to detangle my hammock ropes?
We don’t recommend it. Fork tines and comb teeth can snag and fray individual fibers, weakening the rope even if it looks fine afterward. Your fingers, a craft pick, or a blunt skewer do the same job without the damage.
How long does it take to detangle a badly knotted hammock?
A single knot usually takes five to fifteen minutes. A hammock that’s been crammed into a storage bag all winter might need an hour of casual work. Spread it out, put on some music, and chip away at it a little at a time.
Will detangling stretch out or damage my hammock ropes?
Not if you work slowly and avoid pulling hard on the ends. Gentle finger work keeps the rope’s weave intact. The real danger comes from yanking, cutting, or using sharp tools, so take your time and your hammock will hold up fine.
Can I put my rope hammock in the washing machine to loosen knots?
Please don’t. Machine washing can tangle the ropes worse, stretch them out of shape, and stress the spreader bars and hardware. If the rope is stiff or dirty, hand rinse it gently and let it air dry flat instead.
What’s the best way to fold a rope hammock for storage?
Gather both ends in your hands, bring them together, and form a few wide, loose loops, like coiling a garden hose. Secure it with a soft tie, then hang it on a hook or store it in a roomy bag. Avoid tight balls and stuffed stuff sacks whenever you can.