Fix Your Rope Hammock: A Step-by-Step Guide
Yes, you can definitely repair a rope hammock. Most common issues involve fraying or broken ropes, and they can often be fixed with simple tools and a little patience. Don’t toss your favorite lounger just yet!
A well-maintained hammock can last for years. When those ropes start to fray or snap, it’s easy to feel like your relaxing days are numbered. But we found that most repairs are quite straightforward, saving you money and keeping your outdoor oasis intact.
- Fix fraying ropes by weaving in new strands.
- Replace broken ropes with strong, durable cord.
- Secure ends properly to prevent future unraveling.
- Inspect your hammock regularly for wear.
- Consider reinforced stitching for extra strength.
Ready to get your hammock back in top shape? Let’s walk through exactly how to make those repairs, step by step.
Fixing Your Favorite Rope Hammock
Your trusty rope hammock has seen better days, huh? Don’t worry, that’s a common problem. Most issues, like fraying ends or a snapped rope, are totally fixable. We found that with a few simple tools and a bit of your time, you can bring your hammock back to life.
Think of your hammock as your personal cloud. When a rope gives way, it feels like your cloud is deflating! But we’ve got the steps to reinflate it.
Assessing the Damage: What’s Wrong with Your Hammock?
Before you grab your tools, take a good look at your hammock. What exactly needs fixing? This will help you decide which repair method is best.
Fraying Ropes: The Gentle Wear and Tear
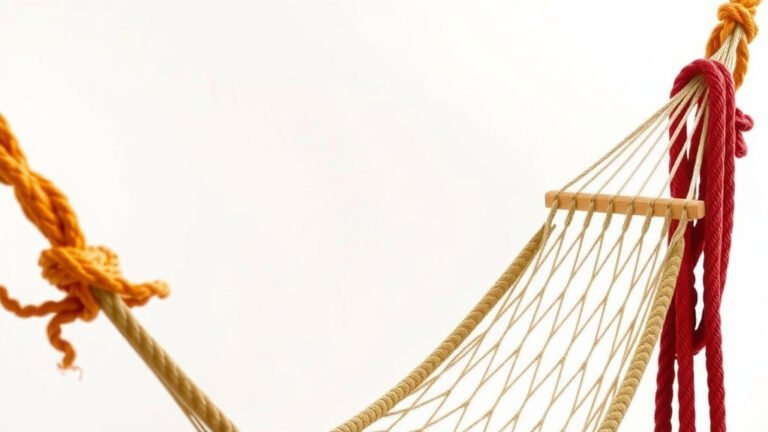
Fraying often happens at the ends where the ropes meet the spreader bars or the suspension loops. It’s like the threads are getting tired. You might see little fuzzy bits, or the rope might start to look thin.
Broken Ropes: The Bigger Problem
A broken rope is more serious. This means the structural integrity of your hammock is compromised. You’ll see a clean snap or a large section of rope that has completely given way. This needs immediate attention to avoid further damage or injury.
Worn Suspension Points: The Stress Zones
Check where the hammock attaches to your stand or trees. Sometimes, the loops or rings here can wear out. This is another area that often needs reinforcement or replacement.
Gathering Your Repair Supplies
You won’t need a whole workshop for this. Most repairs use basic items you might already have or can easily find at a hardware or craft store. Having the right stuff makes the job much smoother.
Essential Tools and Materials
- Durable Rope: For replacing broken ropes, choose a strong, weather-resistant cord. Polyester or nylon are good choices. Match the thickness of your original rope as closely as possible.
- Scissors or Utility Knife: For cutting the new rope cleanly.
- Lighter or Matches: To seal the ends of synthetic ropes and prevent fraying.
- Measuring Tape: To ensure you cut your new rope to the correct length.
- Awl or Large Needle: Helpful for threading ropes through tight spots.
- Duct Tape or Similar: Can be useful for temporarily holding ropes in place.
- Optional: Grommet Kit: If your suspension points are badly damaged, a grommet kit might be needed.
Repairing Fraying Rope Ends
Fraying is usually a sign that the ends of your hammock ropes are starting to come apart. We found that weaving in new material is the best way to fix this.
The Weaving Method
This method works by creating a sort of “rope bandage.”
- Prepare the Area: Gently trim away any loose, wispy fibers from the frayed section. You want a relatively clean surface to work with.
- Cut New Strands: Cut several short pieces of your replacement rope. The number of strands depends on how thick your hammock rope is. You want to create a bundle that matches the original diameter.
- Weave Them In: Lay these new strands alongside the frayed section. Start weaving them over and under the original rope. Think of it like braiding or darning. Work your way along the frayed part.
- Secure the Ends: Once you’ve woven the new strands for a few inches, you need to secure them. You can tie a knot or use a lighter to melt and fuse the ends of synthetic ropes together.
Many guides suggest using a technique similar to splicing to integrate the new fibers. This ensures a strong, lasting repair.
Replacing a Broken Hammock Rope
When a rope snaps, it’s time for a more direct replacement. This sounds scary, but we found it’s quite manageable.
Step-by-Step Rope Replacement
- Remove the Old Rope: Carefully cut away the broken rope. If it’s tied to a spreader bar or loop, untie or unthread it. Make sure you know how the original rope was attached.
- Measure for the New Rope: Measure the length of the broken rope. It’s wise to add a little extra, perhaps 6-12 inches, to give you room to tie secure knots.
- Cut Your New Rope: Cut a new piece of strong rope to your measured length. Remember to account for knot-tying.
- Thread the New Rope: Thread the new rope through the hammock body or where the old one was attached. You might need that awl here to help guide it.
- Attach and Tie: Securely attach one end of the new rope. This usually involves tying a strong knot. Then, work the rope through the hammock, making sure it’s taut but not overly stretched. Finally, attach and tie the other end.
Securing Knots for Strength
The knot is your best friend here. We recommend using a knot that won’t slip. A strong bowline knot or a double fisherman’s knot can work well for many hammock repairs. Research which knot is best for the type of rope you are using. Proper knot tying is key to preventing future failures (American Sailing Association).
Reinforcing Worn Suspension Points
The loops where your hammock hangs can get worn down over time from constant friction. This is where you need to add strength.
Adding Extra Support
If the fabric loops are thinning, you can reinforce them. Use a strong, upholstery-grade thread and a heavy-duty needle to stitch over the worn area multiple times. You are essentially adding layers of strength.
For more severe damage, you might consider adding a metal grommet. This requires a grommet kit and a way to punch a hole, like a hammer and a sturdy surface. Make sure to follow the kit’s instructions carefully.
When to Consider Professional Help or Replacement
While many repairs are DIY-friendly, sometimes a hammock is beyond simple fixing. We found that severe damage can be tricky.
Signs It’s Time for a New Hammock
- Widespread Rotting: If multiple ropes are showing signs of decay or extreme weakness.
- Torn Fabric: If the main hammock fabric itself has large tears.
- Structural Compromise: If the spreader bars are cracked or the main suspension points are completely destroyed.
When in doubt, it’s always better to err on the side of caution. A falling hammock can be dangerous. If the repair seems too complex or the damage is extensive, it might be time to invest in a new one.
Your Hammock Repair Checklist
Keep this handy for your repair:
- Inspect hammock for damage.
- Gather necessary tools and rope.
- Trim frayed ends neatly.
- Measure and cut replacement rope accurately.
- Tie strong, reliable knots.
- Test the repaired hammock carefully.
Conclusion
You’ve got the knowledge to bring your rope hammock back to life! We found that most common issues like fraying ends and broken ropes are totally fixable with just a few supplies. By assessing the damage and following the steps for weaving or replacing ropes, you can enjoy your hammock for seasons to come. Remember to secure your knots well and test your repairs gently. Don’t let a little wear and tear keep you from your relaxation; take on these simple repairs yourself and get back to swaying in the breeze!
Frequently Asked Questions
How do I choose the right replacement rope for my hammock?
When selecting new rope, opt for durable, weather-resistant materials like polyester or nylon. It’s best to match the thickness of your original hammock rope as closely as possible to maintain its comfort and structure.
Can I repair a hammock with multiple broken ropes?
If several ropes are broken or showing significant wear, it might be more practical to replace them all at once. This ensures consistent strength and longevity for your hammock’s main body.
What’s the best way to prevent ropes from fraying in the first place?
Regularly inspect your hammock, especially where ropes connect to the spreader bars or suspension points. Storing your hammock indoors during harsh weather can also significantly reduce wear and tear on the ropes.
How long should a repaired rope hammock last?
With proper repairs using strong materials and regular maintenance, a repaired rope hammock can last for many more years. The lifespan depends on the quality of your repair and how often you use and expose it to the elements.
Is it safe to use a hammock after repairing it?
Yes, it is safe if the repairs are done correctly and thoroughly. Always test the repaired hammock carefully by sitting in it gently before fully reclining. If you have any doubts about the strength of your repair, it’s best to seek professional advice or consider replacement.