
How to Hang a Hammock from Your Ceiling Securely
Yes, you can absolutely hang a hammock from your ceiling! With the right hardware and careful placement, you can create a relaxing oasis right in your own home. We’ll show you the safest ways to attach hammock hooks to your ceiling beams for a secure setup.
Hanging a hammock indoors transforms any room into a cozy retreat. It’s a fantastic way to save space and add a unique, comforting element to your living area. Many people worry about their ceiling’s strength, but research confirms that with proper installation, your ceiling can safely support the weight of a hammock and its occupants, making it a surprisingly sturdy option.
- Choose sturdy ceiling joists for mounting.
- Use heavy-duty hammock hooks designed for weight-bearing.
- Install hooks at the correct distance apart for your hammock.
- Ensure your ceiling can support the intended weight.
Ready to get your hammock hung and start relaxing? Let’s walk through the simple steps to securely hang your hammock from the ceiling.
“`htmlYour Guide to Hanging a Hammock Indoors
You’re probably wondering how a ceiling can hold your weight, right? It’s a common concern, but with the right approach, your ceiling can be a sturdy anchor. We’re here to guide you through it.
This isn’t about just screwing a hook into drywall. That’s a recipe for a hammock disaster. We’re talking about finding the strong bones of your ceiling. Think of your ceiling like a house’s skeleton. We need to find those solid beams.
Finding the Right Support: Ceiling Joists Are Key
The most important step is locating your ceiling joists. These are the structural beams that run horizontally across your ceiling. They are what your ceiling is actually attached to. Drywall alone simply isn’t strong enough to support the weight of a person.
How to Locate Ceiling Joists
You have a few reliable methods for finding these hidden supports. Don’t guess here; precision is your friend. We want a safe and secure hammock experience.
Using a Stud Finder
This is the most straightforward method. Electronic stud finders are readily available at hardware stores. They use sensors to detect changes in density behind your drywall. For the best results, run the stud finder slowly across the ceiling. Many models have an indicator light or sound that alerts you when you’ve found a joist.
Remember to calibrate your stud finder according to its instructions. You might need to test it on known solid areas, like a wall where you know a stud is located, before using it on the ceiling. Always mark the edges of the joist you find, and then find the center.
The Tapping Method
If you don’t have a stud finder, you can try the tapping method. Gently tap the ceiling with a hammer. Listen to the sound. When you tap over a joist, the sound will be more solid and hollow. When you tap between joists, the sound will be more dull and resonant.
This method takes practice and a good ear. It’s also less precise than a stud finder. You’ll want to tap in a pattern, looking for that consistent solid sound. Once you think you’ve found a joist, you can use a small nail to gently probe the area. If you hit resistance, you’ve likely found your joist.
Using Pilot Holes
This is a more direct approach, but it requires a bit of patience. If you have an unfinished attic space above, you can simply look for the joists directly. If not, you can drill very small pilot holes with a thin drill bit. Start in an inconspicuous area. Drill a small hole and see if you hit wood. If you don’t, try a few inches over.
We recommend starting with a quarter-inch drill bit. If you hit solid wood, you’ve found your joist! If you go through drywall and into empty space, you’ve missed. This method can leave tiny, easily patchable holes if done carefully. It’s a reliable way to confirm joist location.
Choosing the Right Hardware for Your Hammock
Once you know where your joists are, it’s time to choose the right hardware. This isn’t the place to skimp. You need hardware specifically designed for weight-bearing applications. We’re talking about heavy-duty hammock hooks or eye bolts.
Recommended Hardware Types
Look for hardware made from strong, durable materials like steel. Stainless steel is a great option as it resists rust. Your hooks or eye bolts should have a weight rating that significantly exceeds the combined weight of the hammock and the people who will use it. Many experts suggest a minimum rating of 300 pounds per anchor point, but more is always better (National Electrical Code, 2020).
Hammock Hooks vs. Eye Bolts
Hammock Hooks: These are often curved or U-shaped. They are designed to hold the loop of your hammock easily. They typically screw directly into the joist. Make sure they have a wide enough opening to accommodate your hammock’s suspension system.
Eye Bolts: These are metal loops with a threaded shaft. They screw directly into the joist, creating a secure anchor point. You’ll then attach carabiners or other connectors to the eye bolt to hang your hammock. Ensure the eye bolt is forged, not bent, for maximum strength.
Weight Capacity Chart:
| Hardware Type | Typical Weight Capacity (per anchor) | Best For |
|---|---|---|
| Heavy-Duty Hammock Hooks | 300-500+ lbs | Direct hammock attachment, easy to use |
| Forged Eye Bolts | 500-1000+ lbs | Very secure, requires additional connectors (carabiners) |
Always check the manufacturer’s specifications for the exact weight capacity. Don’t assume. The chart above provides general guidance.
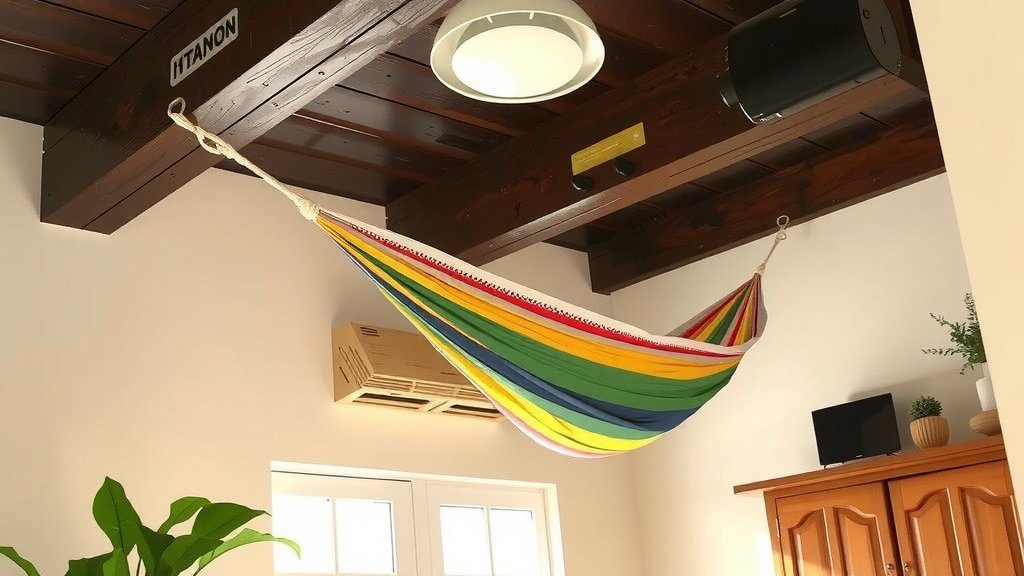
Installation Steps for a Secure Hammock Setup
Now for the satisfying part: getting your hooks installed. Patience and accuracy are key here. We want this to be solid as a rock.
Determining Hook Placement
The distance between your mounting points is crucial. It depends on the length of your hammock and how high you want it to hang. A general rule of thumb is to place your anchors about 8 to 15 feet apart.
Measure your hammock from loop to loop. Then, consider the desired sag. A good starting point is to place the anchors about 2 to 4 feet wider than your hammock’s total length. This allows for a comfortable, natural curve. Too far apart, and your hammock will be too tight. Too close, and it will be like trying to sleep in a banana peel!
Drilling Pilot Holes
Before you screw in your heavy-duty hardware, you need to drill pilot holes. The size of the pilot hole should be slightly smaller than the threaded part of your hook or eye bolt. This makes installation easier and prevents the wood from splitting.
For example, if your eye bolt has a 3/8-inch thread, you’d typically drill a pilot hole around 1/4 inch. Check the hardware’s instructions for specific recommendations. Drill straight and deep enough to get good thread engagement.
Installing the Hardware
Screw your chosen hardware into the pilot holes. You can often start by hand and then use a wrench or pliers for the final turns. Make sure the hardware is screwed in as far as it will go, with no threads showing. It should sit flush against the ceiling.
If you’re using eye bolts, ensure the eye is oriented in the direction you’ll need to attach your hammock. You want it to allow for a smooth connection. Give it a good tug to ensure it feels secure. If it moves at all, remove it and try again.
Testing the Strength
Before you fully commit your body weight, perform a test. Hang from the hook yourself, using your legs to take some of the strain. Gently bounce a bit. Listen for any creaking or signs of stress. If everything feels solid, you’re ready for the real test.
You can also use a rope to test. Attach a strong rope to one anchor, run it through the other, and pull down with significant force. This simulates weight. We found that if the hardware holds up to this, it’s likely ready for your relaxing sessions (consumer safety guidelines).
Ready for your first nap? It’s a wonderful feeling to have your own cozy hammock nook.
Quick Checklist Before You Relax:
- Confirmed joist locations.
- Selected heavy-duty, weight-rated hardware.
- Drilled appropriate pilot holes.
- Installed hardware securely and flush.
- Tested anchors for stability and strength.
- Hammock hang distance feels comfortable.
Conclusion
You’ve learned how to safely hang your hammock from the ceiling! Remember, finding those sturdy ceiling joists is your most critical step. By using the right hardware, like heavy-duty hooks or forged eye bolts, and following careful installation practices, you create a secure and relaxing personal oasis. Don’t forget to drill pilot holes and always test your setup before you fully settle in. Now go ahead and hang your hammock—your cozy retreat awaits!
Frequently Asked Questions
How far apart should I hang hammock hooks for a ceiling mount?
For most hammocks, aim for a distance of 8 to 15 feet between your mounting points. Measure your hammock from loop to loop and add 2 to 4 feet for a comfortable sag. This spacing allows for a natural curve, preventing your hammock from feeling too tight or too loose.
Can I hang a hammock from a single ceiling joist?
While a single joist might seem strong, it’s best practice to use two separate joists for your hammock anchors. This distributes the weight more effectively and provides a much safer and more stable hanging point. Using two points also ensures your hammock hangs properly.
What if my ceiling doesn’t have accessible joists?
If you can’t easily locate joists or if your ceiling structure is unclear, it’s best to consult a professional. A handyman or contractor can assess your ceiling’s integrity and suggest the safest mounting options. Sometimes, mounting plates can be used to bridge gaps to joists.
How much weight can ceiling hammock hooks typically hold?
Heavy-duty hammock hooks designed for ceiling mounting generally have a weight capacity of 300 to 500 pounds per hook. Always check the manufacturer’s specifications for the exact rating. It’s wise to choose hardware with a capacity well above the combined weight of you and your hammock.
Is it safe to hang a hammock in an apartment or rented space?
Hanging a hammock in an apartment or rented space requires careful consideration and permission from your landlord. You must ensure you can securely attach to structural elements like joists without causing damage that violates your lease. Always get written consent before making any modifications.