
How to Hang a Hammock with Straps: Easy Steps
Hanging a hammock with straps is a straightforward process. You’ll generally need two strong tree straps, a hammock with suspension, and a way to secure the straps. It’s a quick and easy way to set up your cozy outdoor spot.
Using straps is often preferred over ropes because they distribute weight better and are gentler on trees. Many hammock systems come with straps, making it even easier to get started. You can be relaxing in minutes with the right setup.
- Choose sturdy tree straps.
- Find two strong anchor points.
- Wrap straps around anchor points.
- Connect your hammock to the straps.
- Test for security before full use.
Ready to set up your relaxation station? Let’s walk through exactly how to hang your hammock using straps, step by step.
Getting Your Hammock Hung with Straps
Hanging a hammock with straps is a **fantastic and tree-friendly way** to create your personal relaxation zone. Straps distribute your weight evenly. This helps protect the trees you’re using. You’ll be lounging in no time!
Choosing the Right Hammock Straps
Not all straps are created equal. You want straps that are **strong and durable**. Look for straps made from high-quality nylon or polyester webbing. Many hammock kits come with straps, which is convenient. If yours didn’t, or if you need replacements, make sure they can **support your weight and the hammock’s weight**.
Consider the length of the straps. Longer straps give you more flexibility in choosing anchor points. This is especially helpful if your trees are farther apart or if you need to get around a wider trunk. A good length to aim for is generally 10 feet or more per strap. Some straps are even longer, offering ultimate versatility.
What to Look for in Strap Material
Nylon and polyester are common choices. Nylon tends to be very strong and can stretch slightly, which can absorb shock. Polyester is known for its **durability and resistance to UV rays**, meaning it won’t degrade as quickly in the sun. Both are excellent options. Check the weight rating on the straps to ensure they meet your needs. You don’t want them failing when you’re mid-nap!
Finding the Perfect Anchor Points
The success of your hammock setup hinges on finding **two sturdy anchor points**. Most often, these are trees. But what makes a tree a good anchor point?
Tree Selection Tips
You need trees that are **healthy and mature**. Avoid young saplings or trees that show signs of disease, rot, or damage. A good rule of thumb is to choose trees with a diameter of at least 6 inches. This ensures they can **safely bear your weight** (Mayo Clinic).
When you assess a tree, check its roots and bark. Are the roots exposed or damaged? Is the bark peeling excessively or does it look soft? These could be signs of underlying problems. If you’re unsure about a tree’s health, it’s always best to choose another one. Your safety and the tree’s well-being are paramount.
Other Anchor Point Options
If trees aren’t available, you might consider other sturdy structures. **Strong, load-bearing posts** can work. Make sure they are securely set in the ground and can handle the force. Some people use their car’s roof rack, but this requires specific car racks and careful consideration of weight distribution and movement. For most, trees are the most practical and enjoyable option.
The Step-by-Step Hanging Process
Now for the fun part! Let’s get your hammock set up. It’s a **simple, repeatable process** once you do it a couple of times.
Step 1: Secure the First Strap
Take one of your tree straps. Find a comfortable height on your chosen tree. This is usually around **4 to 6 feet off the ground**. Wrap the strap around the trunk. Make sure the strap lies flat against the tree, not twisted. Feed one end of the strap through the loop on the other end. Pull it tight. You’ll want it snug, like a firm hug for the tree. Many straps have multiple loops to adjust the height and tension easily.
Step 2: Secure the Second Strap
Repeat the exact same process for the second tree. Make sure the second strap is at a **similar height** to the first one. The height difference will affect how your hammock hangs. A small difference is fine, but large differences can make it hang awkwardly. Aim for the anchor points to be roughly parallel to each other.
Step 3: Connect Your Hammock
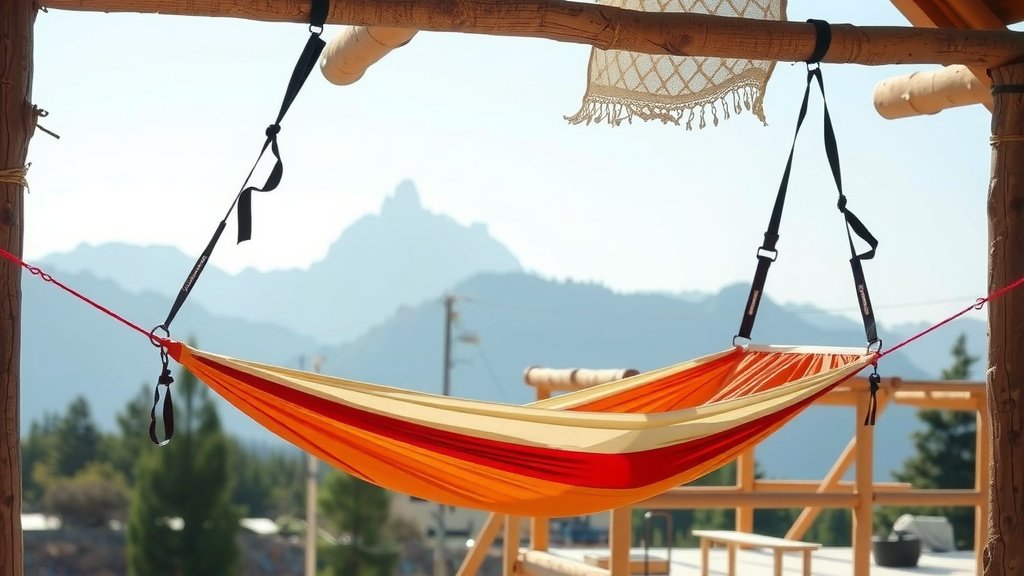
Most hammocks come with carabiners or other hardware attached to the ends. Take a carabiner on one end of your hammock. Hook it into one of the loops on your first tree strap. Do the same for the other side. Connect the second carabiner to a loop on the second tree strap. You can adjust the connection point on the straps to get the perfect sag and tension. A gentle curve, like a smile, is ideal.
Step 4: Test Your Setup
Before you fully settle in, it’s **crucial to test the security**. Gently pull down on the hammock. Sit in it carefully, applying your weight slowly. Listen for any creaking or slipping sounds. Give it a gentle wiggle. This quick check ensures everything is stable and safe. You want to be confident that your hammock won’t suddenly drop you!
Tips for the Perfect Hang
Getting the hang just right can take a little practice. Here are a few pointers to help you achieve that **ideal hammock experience**.
- The 30-Degree Rule: Many hammock enthusiasts recommend that your suspension straps should form roughly a 30-degree angle with the ground when you’re in the hammock. This angle provides a comfortable, relaxed hang.
- Adjust for Sag: Don’t aim for a completely taut hammock. A little bit of sag is good for comfort. If it feels too tight, move your straps to a slightly lower point or use a different loop. If it’s too saggy, move them higher.
- Consider the Spacing: The distance between your anchor points will dictate how many adjustment options you have. Closer anchor points might require shorter straps or more careful height selection.
Here’s a quick checklist to make sure you’ve got it right:
- Straps are wrapped securely around healthy trees.
- Anchor points are at roughly the same height.
- Hammock is connected to both straps.
- No twisting or excessive bunching of straps.
- Tested for stability before full use.
Conclusion
You’ve learned how to easily hang your hammock using straps. You know to pick sturdy straps and find healthy trees. Following the steps ensures a secure and comfortable setup. Now you’re ready for relaxation! Go ahead and find your perfect spot. Get your hammock up and enjoy some well-deserved downtime.
Frequently Asked Questions
How far apart should my trees be to hang a hammock?
The ideal distance between trees depends on your hammock and strap length. Generally, 10 to 15 feet apart is a good range. If your trees are farther apart, you’ll need longer straps. Shorter distances might require careful placement of your straps on the trees.
Can I use hammock straps on a wooden post instead of a tree?
Yes, you can use sturdy, load-bearing wooden posts. Make sure the post is securely set in the ground and strong enough to support your weight. Avoid posts that seem weak or wobbly. The post should have a similar diameter to a healthy tree trunk.
What’s the best height to hang my hammock straps on the trees?
A good starting point is 4 to 6 feet off the ground. This height usually allows for a comfortable hang with a nice curve. You can adjust this based on your preference and the distance between your anchor points. Experiment to find what feels best for you.
My hammock feels too tight or too saggy. How do I fix it?
This is all about adjusting the strap loops. If it’s too tight, move the carabiner to a lower loop on the strap, giving it more slack. If it’s too saggy, move the carabiner to a higher loop to tighten it. You’re aiming for a gentle curve, like a smile.
Are hammock straps bad for trees?
No, using wide hammock straps is actually very tree-friendly. They distribute your weight over a larger surface area, which is much gentler on the tree bark than ropes. Always check that your chosen trees are healthy and mature to avoid any harm.