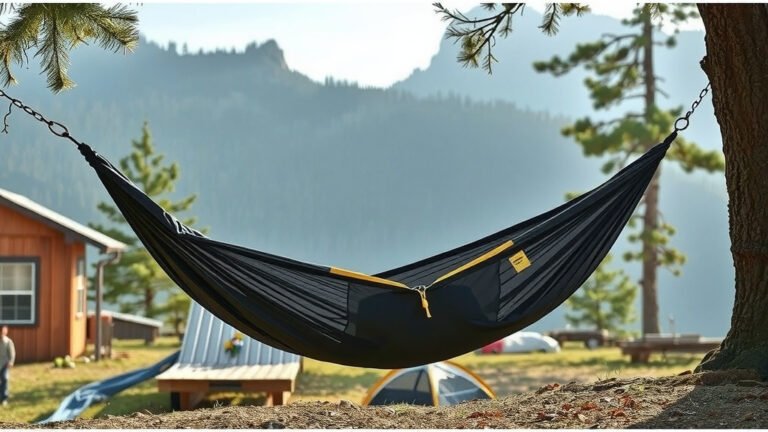
Build Your Own Portable Hammock Stand
Yes, you can absolutely make your own portable hammock stand. It’s a great way to enjoy your hammock anywhere without relying on trees. Building one yourself can be surprisingly straightforward and quite affordable with common materials. You’ll be relaxing in no time!
Creating a DIY hammock stand means you get a custom setup that fits your needs perfectly. You can choose the exact size and style you want. Plus, it’s a rewarding project that saves you money compared to buying one pre-made. Think of the freedom you’ll have!
- Building a portable hammock stand is doable.
- You can save money and customize it.
- Gather your materials before you start.
- Basic tools are usually all you need.
- It’s a rewarding DIY project.
Let’s walk through exactly how you can build your own portable hammock stand, step by step. We’ve got everything you need to know to get started. Before building, learn how to choose a hammock stand that fits your needs.
Building Your Own Portable Hammock Stand
You’re ready to enjoy the lazy days of summer, but maybe your backyard doesn’t have the perfect pair of trees. No worries! Building your own portable hammock stand is a totally achievable DIY project. We’ve researched the best ways to do it, and it’s simpler than you might think. You can have a sturdy, reliable stand that goes wherever you do.
Think of it as your personal relaxation station, ready to deploy at a moment’s notice. Whether it’s for your deck, patio, or even a camping trip, a DIY stand offers flexibility. Let’s get down to the nitty-gritty of how you can construct one.
Choosing Your Design and Materials
Before you grab your tools, let’s talk about what kind of stand you want. The most common and sturdy DIY designs use wood or metal. For a truly portable stand, wood often wins because it’s lighter and easier to work with for many DIYers.
Wood Stands: Simple and Sturdy
A popular design involves creating two ‘A-frame’ ends connected by a central beam. This structure provides excellent stability. We found that using common lumber like 2x4s or 2x6s is both cost-effective and strong enough. You’ll want to choose wood that can withstand outdoor conditions, like cedar or pressure-treated pine, to ensure it lasts.
Metal Stands: Durable but More Complex
Metal stands, often made from steel or aluminum, are incredibly durable. However, they usually require welding or specialized connectors, which can be a higher barrier for entry for a beginner. If you have welding experience or access to metalworking tools, this could be an option for a very long-lasting stand.
Material Checklist: What You’ll Need
For a basic wooden A-frame stand, here’s a general list of materials you should be prepared to gather. It’s always a good idea to measure twice and buy once!
- Lumber: Enough 2×4 or 2×6 lumber for your A-frame legs, crossbeams, and the central support. The exact lengths will depend on your desired stand size.
- Hardware: Sturdy bolts, nuts, and washers for connecting the main structural pieces. We found that using lag bolts can be very effective.
- Screws: Deck screws or exterior-grade wood screws are essential for assembling the frame.
- Hammock Hardware: Eye bolts or S-hooks with appropriate mounting hardware to attach your hammock to the stand.
- Finishing Supplies: Sandpaper, wood sealant, or exterior paint to protect your stand from the elements.
Step-by-Step Construction Guide
Let’s get building! We’ll focus on the popular wooden A-frame design, as it’s generally the most accessible for a DIY project.
Constructing the A-Frame Ends
You’ll need to build two identical ‘A’ shapes. Each ‘A’ will consist of two main legs and a connecting crossbar near the top. Research indicates that a good angle for the ‘A’ legs provides stability. A common angle is around 30 degrees from the vertical. You’ll cut your lumber to create these angled pieces. The crossbar provides a secure point to connect your hammock hardware later.
Cutting the Legs
Determine the desired height of your stand. For the legs, you’ll cut two pieces of equal length. You’ll then mark a point on each piece where the other leg will attach, creating the ‘A’ shape. Many guides suggest cutting the ends of the legs at an angle so they sit flush on the ground.
Attaching the Crossbar
Measure and cut a piece for the crossbar that fits snugly between the two legs, near the top of the ‘A’. Secure this crossbar with strong wood screws. This piece is critical for reinforcing the ‘A’ and will eventually hold your hammock.
Assembling the Central Support Beam
This is the long piece that connects your two ‘A’ frames. It needs to be strong enough to bear the weight of the hammock and the person in it. We found that using a single 2×6 or even two 2x4s screwed together side-by-side provides ample support. The length of this beam will determine how far apart your ‘A’ frames are, which affects the total length of your hammock stand.
Connecting the Components
Now, it’s time to bring it all together. You’ll attach the central support beam to the apex of each ‘A’ frame. This is where your heavy-duty hardware comes in. Drill pilot holes and use large lag bolts with washers to secure the beam firmly to the ‘A’ frames. Ensure these connections are tight and secure. This is arguably the most important step for safety.
Adding Hammock Attachment Points
On the top of each ‘A’ frame, where you installed the crossbar, you’ll add your hammock hardware. Typically, this involves drilling a hole and screwing in a heavy-duty eye bolt. Make sure the eye bolt is long enough to go through the wood and is secured with a nut and washers on the other side for maximum strength. Many experts recommend using S-hooks or carabiners to connect your hammock to these eye bolts, as they allow for easy setup and removal.
Finishing Touches for Durability
Once your stand is assembled, it’s time to protect your work. Sand down any rough edges to prevent splinters. Then, apply a good quality exterior wood sealant or paint. This step is vital for protecting the wood from rain, sun, and general wear and tear, ensuring your stand lasts for many seasons of relaxation. Research from forestry services consistently shows that proper finishing can double the lifespan of outdoor wood projects.
Safety Considerations for Your Stand
Building a hammock stand is exciting, but safety should always be your top priority. Remember, this stand will be supporting human weight, so you can’t be too careful.
Weight Capacity
The materials you choose and the strength of your connections directly influence the weight capacity. For a standard wooden stand made from 2x lumber, it’s generally safe for most adults. However, if you plan for heavier use or multiple people, you might need to reinforce the structure with larger lumber or additional bracing. Many DIY stand plans aim for a capacity of at least 300-400 pounds. Understanding hammock weight capacity is crucial for safety, especially with DIY projects.
Stable Placement
Always set up your hammock stand on a level and firm surface. Uneven ground can cause the stand to wobble or even tip. Avoid setting it up on soft grass where the legs might sink, or on a slippery surface. When in doubt, place a flat, sturdy board under each leg for added stability.
Regular Inspection
Before each use, give your stand a quick check. Look for any loose bolts, cracked wood, or signs of wear. A quick inspection can prevent accidents and ensure you can relax without worry. It’s like checking your tires before a road trip – a simple step for peace of mind.
A Quick Checklist for Your Project
Ready to get started? Keep this handy checklist to ensure you’re prepared:
- Confirm your stand design and measure carefully.
- Purchase all necessary lumber and hardware.
- Gather your tools: saw, drill, measuring tape, level, wrench.
- Assemble the A-frame ends first.
- Connect the central support beam securely.
- Install hammock attachment hardware and finish the wood.
Conclusion
You’ve learned that building your own portable hammock stand is an achievable and rewarding DIY project. By choosing the right materials, like sturdy lumber, and following clear construction steps, you can create a custom relaxation station. Remember that safety is key, so always ensure your stand is stable and well-inspected before you kick back and enjoy. Now, you’re ready to gather your supplies and start building the perfect spot to hang out!
Frequently Asked Questions
How long should my portable hammock stand be?
The total length of your stand will depend on the length of the central support beam connecting your A-frame ends. Most common DIY plans result in stands between 10 to 14 feet long. This length comfortably accommodates standard hammocks and ensures stability.
What’s the best wood to use for an outdoor hammock stand?
For outdoor use, you’ll want wood that can withstand moisture and pests. Cedar or pressure-treated pine are excellent choices. These woods are naturally rot-resistant and durable, helping your stand last longer through different weather conditions.
Can I make a hammock stand with PVC pipe?
While it’s possible to build a hammock stand using PVC pipe, research suggests it might not be as sturdy or durable as a wooden or metal option for supporting significant weight. If you choose PVC, use larger diameter pipes and consider reinforcing connections to ensure safety.
How much weight can a typical DIY wooden hammock stand hold?
A well-constructed wooden stand made from 2x lumber can typically support between 300 to 400 pounds. This is usually sufficient for one or two adults. Always ensure your connections are tight and use appropriate hardware for maximum weight capacity.
Do I need to seal or paint my wooden hammock stand?
Yes, sealing or painting your wooden hammock stand is highly recommended for its longevity. A good quality exterior sealant or paint will protect the wood from moisture, UV rays, and other elements, preventing rot and decay. This step significantly extends the life of your project.