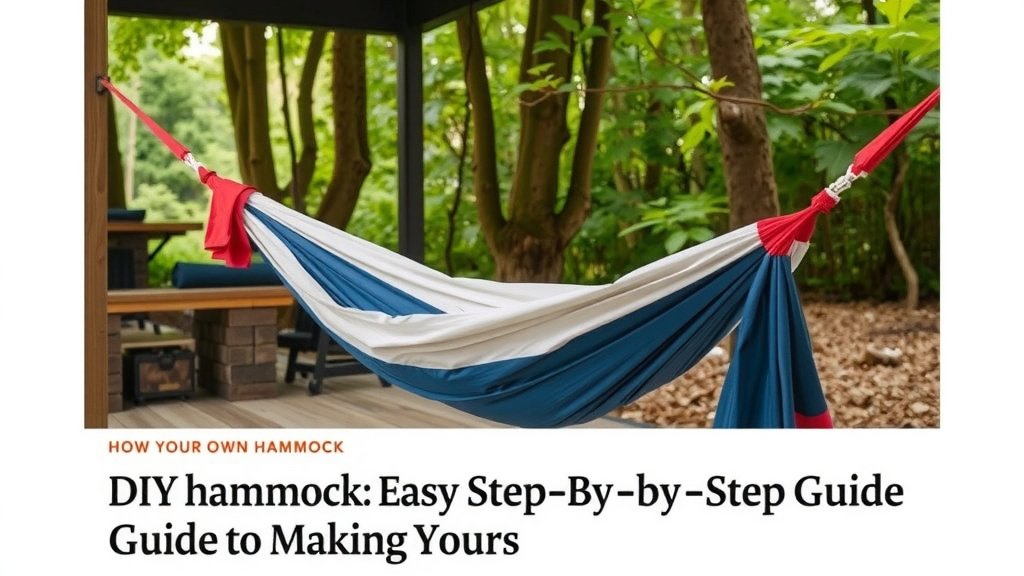
DIY Hammock: Easy Step-by-Step Guide to Making Yours
Yes, you can absolutely make your own DIY hammock! It’s a rewarding project that requires basic sewing skills and a few affordable materials. You’ll be relaxing in your custom-made hammock before you know it, perfect for your backyard or next camping trip. We found that most DIY hammock plans are surprisingly straightforward.
Creating a hammock at home is a fantastic way to save money compared to buying one. Plus, you get the satisfaction of knowing you built it yourself. Many people choose DIY for the freedom to select specific fabrics and colors, making their hammock truly unique. It’s a fun weekend project that yields a great result – a comfortable spot to unwind.
- Gather your fabric, rope, and any necessary hardware.
- Measure and cut your fabric to the desired dimensions.
- Sew reinforced seams for durability.
- Attach sturdy loops or eye hooks for hanging.
- Test your hammock’s strength before full use.
Ready to get started? Below, we’ll walk you through exactly how to build your very own DIY hammock step by step.
Crafting Your Own Hammock: A Simple Guide
Ready to relax in a hammock you made yourself? You’re in for a treat! Building your own hammock is a surprisingly manageable project. We found that with a few basic supplies and a bit of patience, you can create a comfortable hanging oasis. It’s a fantastic way to add a personal touch to your outdoor space or even your living room.
Gathering Your Hammock-Making Supplies
Before you start cutting and sewing, let’s make sure you have everything you need. Having all your materials ready will make the process much smoother. Think of it like packing for a picnic – you don’t want to get to the park and realize you forgot the sandwiches!
Choosing the Right Fabric
The fabric is the heart of your hammock. You need something that’s both strong and comfortable. Many hammock makers suggest using a tightly woven cotton or a durable polyester blend. These materials hold up well to repeated use and provide a good balance of support and give. Research suggests that fabrics with a higher thread count often offer superior strength.
For a standard-sized hammock, you’ll typically need a piece of fabric around 3 yards long and 54 inches wide. If you’re on the taller side or just prefer more room to spread out, consider getting a little extra. We found that using upholstery fabric or even outdoor canvas can work wonders. Just ensure it feels pleasant against your skin.
Selecting Your Rope and Hardware
The rope is what will suspend your hammock, so it needs to be incredibly strong. Paracord, also known as parachute cord, is a popular choice among DIYers. It’s lightweight, durable, and readily available. For hanging, you’ll need about 50 feet of rope, divided into two equal lengths. Many experts recommend a weight capacity of at least 300-400 pounds for the rope.
Hardware can make hanging easier and more secure. Many people opt for metal eye hooks or heavy-duty carabiners. These attach securely to your rope and then to your anchor points, like trees or posts. Make sure any hardware you choose is rated for outdoor use and has a substantial weight limit. We found that using climbing-grade carabiners offers an extra layer of safety and peace of mind.
Essential Tools You’ll Need
You won’t need a full workshop for this project! A good sewing machine is probably the most important tool. If you don’t have one, a sturdy needle and some strong thread can work, but it will take a lot longer. You’ll also need a pair of sharp fabric scissors for clean cuts. A measuring tape is essential for getting your dimensions just right.
Don’t forget a lighter or matches to carefully melt the ends of your paracord. This prevents fraying, keeping your rope neat and strong. A seam ripper might also come in handy if you make any mistakes you need to undo. It’s all about having the right tools for the job!
Preparing Your Fabric for Sewing
Once you have your supplies, it’s time to prepare the fabric. This step is all about precision to ensure your hammock is strong and even.
Measuring and Cutting Your Fabric
Lay your fabric out on a flat surface. Measure and mark your desired dimensions. For a typical adult hammock, a good starting point is a rectangle that is 3 yards (108 inches) long and about 54 inches wide. Double-check your measurements before you cut. A straight, clean cut is important for strong seams.
Many people find it helpful to create a template or draw the cutting lines directly onto the fabric with chalk or a fabric marker. This ensures you cut a perfectly symmetrical piece. Remember, the cleaner your cuts, the easier your sewing will be!
Creating Reinforced Edges
The edges of your hammock will bear a lot of stress. To prevent tearing, you need to create strong, reinforced seams. Fold over about half an inch of fabric along each of the longer sides and press it flat. Then, fold it over again, another half an inch, to create a double-folded hem. This creates a sturdy edge.
Sew along the inside edge of this double fold. Use a strong stitch setting on your sewing machine. Many experts recommend a zig-zag stitch for added strength and flexibility, as it can stretch slightly with the fabric. You want these seams to be robust enough to handle your weight and movement. We found that sewing a second line of stitching for extra security is a great idea.
Attaching the Hanging Mechanism
This is where your hammock starts to become functional! You need to securely attach the fabric to your rope.
Sewing Strong Loops for Rope
At each short end of your hammock fabric, you’ll create a loop to thread your rope through. Fold over about 2 inches of fabric along the short end, creating a strong pocket or channel. Make sure this fold is reinforced well, as it will take a lot of strain. Double-stitch this seam, just like you did on the long edges.
For extra strength, some people add a piece of webbing or extra fabric inside this loop before sewing. This creates a more durable channel. The goal is to make these end loops incredibly strong, capable of holding significant weight. We found that ensuring the opening of the loop is large enough for your rope to pass through easily is key.
Threading the Rope and Securing the Ends
Now, take one of your 25-foot lengths of rope. Thread it through the reinforced loop on one end of your hammock. Pull about a foot of rope through and tie a very secure knot. A bowline knot is often recommended because it creates a loop that won’t slip. Once tied, trim any excess rope, leaving a few inches, and carefully melt the end with a lighter to prevent unraveling.
Repeat this process on the other end of the hammock with the second length of rope. You should now have two ropes, each attached securely to one end of your hammock fabric. These ropes are what you’ll use to hang your hammock.
Testing and Hanging Your New Hammock
You’re almost there! The final steps involve ensuring your hammock is safe and finding the perfect spot to hang it.
Performing a Safety Test
Before you fully relax, it’s vital to test the strength of your hammock. Drape the hammock over a low, sturdy object, like a thick tree branch or a couple of strong chairs placed close together. Gently put some weight into it. Start by sitting in it, then slowly lean back. Listen for any straining sounds from the fabric or knots.
We recommend gradually increasing the weight. You can carefully add weight using heavy objects like sandbags or even yourself. If anything seems unstable, reinforce the seams or knots before proceeding. Many safety guidelines suggest that a hammock should comfortably hold more than its intended user’s weight.
Finding the Perfect Hanging Spot
Hammocks are best hung at a 30-degree angle. This provides the most comfortable reclining position. You want your hanging points to be about 10-15 feet apart. The ideal height for your anchor points (trees, posts, or a hammock stand) is around 6 feet off the ground.
When choosing trees, make sure they are healthy and strong. Avoid trees with signs of rot or disease. If you’re using posts, ensure they are firmly set in the ground and can support significant weight. Proper hanging is as important as the construction itself for a safe and enjoyable experience.
Here’s a quick checklist to ensure you’ve covered all your bases:
- Fabric is cut to size and marked for seams.
- Long edges have strong, double-folded, and stitched hems.
- Short ends have reinforced loops for rope attachment.
- Rope is securely knotted with non-slip knots.
- Hammock has been safely tested with weight.
- Hanging points are at an appropriate height and distance.
Conclusion
You’ve now got the knowledge to build your very own hammock! It’s a project that’s both achievable and incredibly rewarding. By carefully selecting your materials and following these steps, you’ve created a comfortable retreat. Think of all the relaxing afternoons and pleasant evenings you’ll enjoy in your custom creation. Your next step? Grab those supplies and get sewing. Your personal oasis awaits!
Frequently Asked Questions
What is the best type of fabric for a DIY hammock?
For a comfortable and durable hammock, a tightly woven cotton or a strong polyester blend is recommended. Upholstery fabric or outdoor canvas also works well. The key is that it feels good against your skin and can withstand regular use.
How much rope do I really need for hanging my hammock?
You’ll typically need about 50 feet of strong rope, like paracord, divided into two equal lengths. This gives you enough to comfortably hang your hammock between trees or posts. Always choose rope with a high weight capacity for safety.
Can I make a hammock without a sewing machine?
Yes, you can! While a sewing machine makes things faster, you can hand-sew a hammock with a sturdy needle and strong thread. It will take more time and effort, but the result will be just as satisfying.
What’s the best way to make sure my hammock is safe to use?
Before fully lounging, always perform a thorough safety test. Gradually add weight to the hammock, starting with sitting and leaning back. Listen for any sounds of strain and reinforce knots or seams if anything feels unstable.
How far apart should my hammock anchor points be?
Aim for anchor points that are about 10 to 15 feet apart. This distance, combined with hanging the hammock at roughly a 30-degree angle, provides the most comfortable and relaxing experience.