How to Refinish a Hammock Spreader Bar in 5 Simple Steps
The easiest way to refinish a hammock spreader bar is to sand off the old finish, clean the surface, then apply a fresh coat of exterior-grade paint or wood sealer. Most bars only need about an hour of active work. The rest is just drying time.
Why bother? Because your spreader bar takes a beating from sun, rain, and humidity. Over time, that weathering leads to peeling finish, gray wood, and even rot. We researched common hammock care tips and found that a quick refinishing job can add years to your bar’s life. Not bad for a Saturday afternoon, right? For the fabric side of upkeep, our guide to washing a hammock covers the cleaning steps.
- Sand the bar to remove old paint, stain, or rough spots.
- Clean off dust and let the wood dry completely.
- Apply exterior paint, stain, or spar urethane for weather protection.
- Let it cure fully before rehanging your hammock.
- Repeat every year or two to keep the wood in great shape.
Below, we walk you through the whole process step by step, from picking the right finish to avoiding the mistakes that send people back to the store. Grab some sandpaper and let’s get started.
Refinishing Your Hammock Spreader Bar Step by Step
Here’s the short version of the whole job: sand, wipe, dry, seal, cure. That’s it. We found that most people finish the hands-on part in under an hour, and the rest is just waiting for the finish to harden. Below, we break each stage into plain, doable steps.
Before you start, gather your supplies. Nothing fancy is needed. A quick shopping run (or a peek in your garage) usually covers it.
- Medium-grit sandpaper (80 to 120 grit) for stripping the old finish.
- Fine-grit sandpaper (180 to 220 grit) for a smooth final pass.
- Sanding block or orbital sander to save your arms.
- Damp rag or tack cloth for dust cleanup.
- Exterior paint, stain, or spar urethane — your weather shield.
- Brush, drop cloth, and gloves to keep things tidy.
Choosing the Right Finish for Your Spreader Bar
Your best option depends on where your hammock lives and the look you want. Many experts recommend marine-grade finishes for anything left outdoors, since they’re built to handle water (like the products the EPA notes for outdoor wood protection).
Spar Urethane vs. Paint vs. Stain
Think of spar urethane as a raincoat. It sits on top of the wood and blocks moisture. Paint does the same but adds color. Stain soaks in and darkens the grain while adding some UV fighters.
| Finish | Best For | How Long It Lasts |
|---|---|---|
| Spar urethane | Bars that stay outside year-round | 1–2 years |
| Exterior paint | Color lovers, shaded patios | 2–3 years |
| Exterior stain | Natural wood look | 1–2 years |
Picking a Quality Product
Read the label before you buy. Look for the words “exterior,” “marine,” or “UV-resistant.” Interior finish on an outdoor bar is like wearing dress shoes to the beach. It looks fine for an afternoon, then falls apart.
Sanding the Spreader Bar Properly
Sanding removes the tired old finish and gives the new one something to grip. Skip this step and your fresh coat will peel like a bad sunburn. Start with medium grit and work until you see bare wood or a dull, even surface.
How Smooth Is Smooth Enough?
Run your hand along the bar. If it feels slick with no bumps or flakes, you’re done with the heavy sanding. Then do one light pass with fine grit. Wipe off all the dust afterward — a tack cloth works great here.
Checking the Wood Before You Seal It
While you’re sanding, look closely for soft spots, cracks, or dark streaks. Press your thumbnail into the wood. If it sinks in like butter, that section may be rotting. Many safety guidelines stress checking wooden structures for rot before reuse (CDC).
Small cracks can be filled with exterior wood filler. Deep soft spots mean it’s time for a new bar. A snapped spreader bar mid-nap is not the relaxation you signed up for.
Applying the New Finish
Work in a dry spot out of direct sun. Direct sunlight makes finish dry too fast, which causes streaks and bubbles. Thin coats beat thick ones every time.
Coat by Coat
Brush the finish on with the grain of the wood. Let the first coat dry per the can’s instructions — usually 2 to 4 hours. Then lightly sand with fine grit, wipe the dust, and add a second coat. Two or three thin coats give the best protection.
Getting the Ends Right
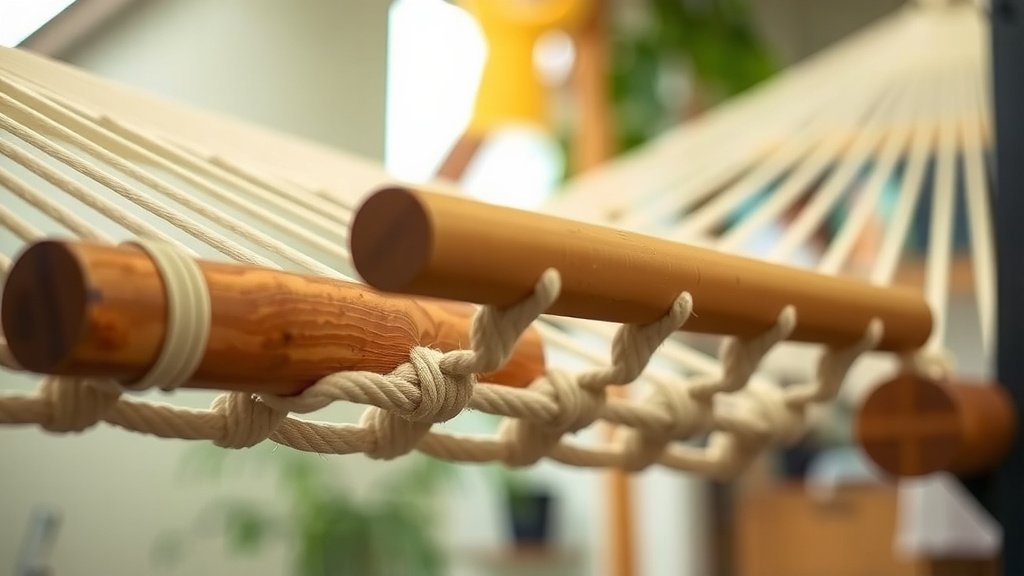
The bar’s ends and rope holes take the most abuse. Water sneaks in there first. Make sure those spots get full coverage, even if you need a small brush or a quick dab with a rag.

Drying and Curing Times You Should Know
Here’s where patience pays off. Dry-to-the-touch is not the same as cured. Most finishes feel dry in hours but need 24 to 72 hours to fully harden. Many manufacturers list full cure times right on the label, so check yours.
Hang your hammock too soon and the rope pressure can dent or stick to the soft finish. Give it the full cure time. Your hammock will still be there tomorrow, promise.
Common Mistakes to Avoid
We found these slip-ups show up again and again in hammock care forums. Dodge them and your project goes smoothly.
- Sanding too lightly — old finish left behind causes peeling.
- Skipping dust cleanup — dust bakes into the new coat.
- Using interior products — they break down fast outdoors.
- Applying thick coats — they drip, bubble, and cure unevenly.
- Rushing the cure — rehanging too early wrecks your work.
Keeping Your Spreader Bar in Good Shape
A little upkeep stretches the life of your refinishing job. Wipe the bar down after heavy rain, and store the hammock indoors or under a cover during winter. Many outdoor-wood guides recommend seasonal checks for moisture damage (NIH notes wood decay thrives in damp conditions). Our full guide to storing a hammock for winter walks through the off-season routine.
Inspect the bar each spring. Look for fading, flakes, or soft wood. A quick touch-up coat costs way less than a whole new hammock stand-in — and takes about fifteen minutes.
Your Quick Refinishing Checklist
Print this out or screenshot it. You’ll thank yourself halfway through the project.
- Pick an exterior-rated finish and read the label.
- Sand with medium grit, then fine grit.
- Check for rot and fill small cracks.
- Wipe away every bit of dust.
- Brush on two or three thin coats.
- Let it cure fully before rehanging.
That’s the whole job. One afternoon of easy work, and your spreader bar comes back looking (and lasting) like new. Grab that sandpaper — your hammock is waiting.
Conclusion
Refinishing your hammock spreader bar is one of those small projects that pays you back big time. You’ve now got the full picture: pick an exterior-rated finish, sand down to bare wood, check for rot, and brush on thin coats with patience between each one. Skip the shortcuts, and you’ll dodge the peeling and rot that send most bars to the trash. We researched the common failure points, and they almost all come down to rushing. So here’s your next step: check the weather, set aside a relaxed afternoon, and give your spreader bar the fresh coat it’s earned. Your future naps will thank you.
Frequently Asked Questions
Can I refinish my spreader bar without removing it from the hammock?
You can, but it makes the job harder. The ropes get in the way of smooth sanding and even brush strokes, and finish can drip onto them. We found that untying or slipping the bar out first gives you a cleaner result in less time.
What grit sandpaper should I start with on an already smooth bar?
If the old finish is intact and just faded, start with 180 or 220 grit to scuff the surface. Heavy sanding isn’t needed if there’s no peeling. You just want to give the new coat something to grip.
Can I spray paint a hammock spreader bar instead of brushing?
Spray works in a pinch, but it goes on thin and often needs many coats to protect the wood. Brush-on spar urethane or exterior paint builds a thicker, longer-lasting barrier. If you spray, use an exterior-rated product and apply several light passes.
How do I refinish a spreader bar with rope holes or grooves?
Use a small detail brush or wrap sandpaper around a dowel to clean out the holes. Dab finish into each hole with a brush tip or cotton rag so the raw end grain gets sealed. Those spots soak up water faster than anywhere else on the bar.
Is it worth refinishing, or should I just buy a replacement bar?
If the wood is solid with no soft spots, refinishing costs a fraction of a replacement and takes about an hour of hands-on work. If your thumbnail sinks into the wood or you see deep cracks, replace it. A new bar is cheaper than a spilled hammock nap.