Master Hammock Rope Splicing: A Step-by-Step Guide
You can absolutely splice your hammock rope to create strong, reliable loops for hanging. Learning how to splice hammock rope yourself saves money and gives you confidence in your gear. It’s a surprisingly accessible skill for anyone who enjoys the outdoors.
This technique is essential for anyone who wants to customize their hammock setup or repair existing suspension systems. We found that a well-executed splice can be just as strong as a knot, if not stronger, and looks much cleaner. It’s a practical skill for any hammock camper or backyard lounger.
- Learn the basics of rope splicing for hammocks.
- Understand why splicing is a great alternative to knots.
- Get a step-by-step guide to creating secure loops.
- Discover tips for choosing the right rope for splicing.
- Ensure your hammock is safely and reliably hung.
Ready to make your hammock setup even better? Let’s walk through exactly how to splice your hammock rope, step by step.
Mastering the Hammock Rope Splice
Splicing hammock rope creates strong, reliable loops for hanging. It’s a rewarding skill that can save you money and boost your confidence. You’ll find this technique is accessible for most outdoor enthusiasts.
Why Splice Instead of Knot?
You might wonder why you’d bother splicing when knots are so common. We’ve found that a well-executed splice offers several advantages over traditional knots. For starters, a splice distributes load more evenly across the rope. This means less stress on any single point. It also creates a very **clean and permanent loop**. Many people find this looks much neater than a bulky knot. Plus, research suggests that some splices can be stronger and less prone to slippage than certain knots, especially under heavy or dynamic loads. Think of it like sewing versus tying; a good stitch can be incredibly strong.
Choosing the Right Rope for Splicing
Not all ropes are created equal when it comes to splicing. The type of rope you choose will greatly affect how easy it is to splice and how strong the resulting loop is. For hammock suspensions, you generally want a rope that is kernmantle construction. This means it has a core surrounded by a woven sheath. This type of rope offers strength and elongation properties that are ideal for hanging hammocks. We’ve found that polyester or nylon kernmantle ropes are popular choices. They offer good UV resistance and durability.
Rope Diameter Matters
The diameter of your rope is also important. While a thicker rope might seem stronger, it can be much harder to work with. For most hammock applications, a rope diameter between 3mm and 7mm is usually recommended. This range provides a good balance of strength and manageability for splicing. Too thin, and it might not be strong enough for your weight and tree conditions. Too thick, and you’ll be fighting with it every step of the way. Always check the weight rating for your chosen rope to ensure it can support your needs safely.
Essential Tools for Splicing
Before you begin, gather a few simple tools. You won’t need a full workshop, but a few key items make the job much easier. Having the right tools is like having sharp knives for cooking; it makes the process smoother and the results better. Here’s what we recommend:
- A fid or splicing needle: This is a long, tapered tool used to open up the rope strands.
- A sharp knife or scissors: For cutting the rope cleanly.
- Tape: To temporarily secure the ends of your rope and prevent fraying.
- A lighter or heat source: To melt and seal the ends of synthetic rope.
You can often find splicing kits online or at marine supply stores. Some people even use a sturdy wire or a small nail as a makeshift fid if they’re in a pinch, but a proper tool is worth the investment for ease and consistency.
The Step-by-Step Splice Process
Now, let’s get down to business. We’re going to walk you through creating a classic eye splice, which is perfect for forming a loop on the end of your hammock suspension line. Remember, patience is key here. Your first attempt might not be perfect, and that’s okay. We found that practice makes a big difference.
Preparing Your Rope
First, decide how large you want your loop to be. This is your “eye.” Measure the circumference you need and mark it clearly on the rope. Then, you’ll need to prepare the end you’ll be splicing. If your rope is synthetic, carefully use your lighter to melt and slightly ball the very end. This prevents it from unraveling completely while you work. You can then flatten this melted end a bit while it’s still warm. Once cooled, wrap a bit of tape around the end to keep it tidy.
Opening the Rope Core
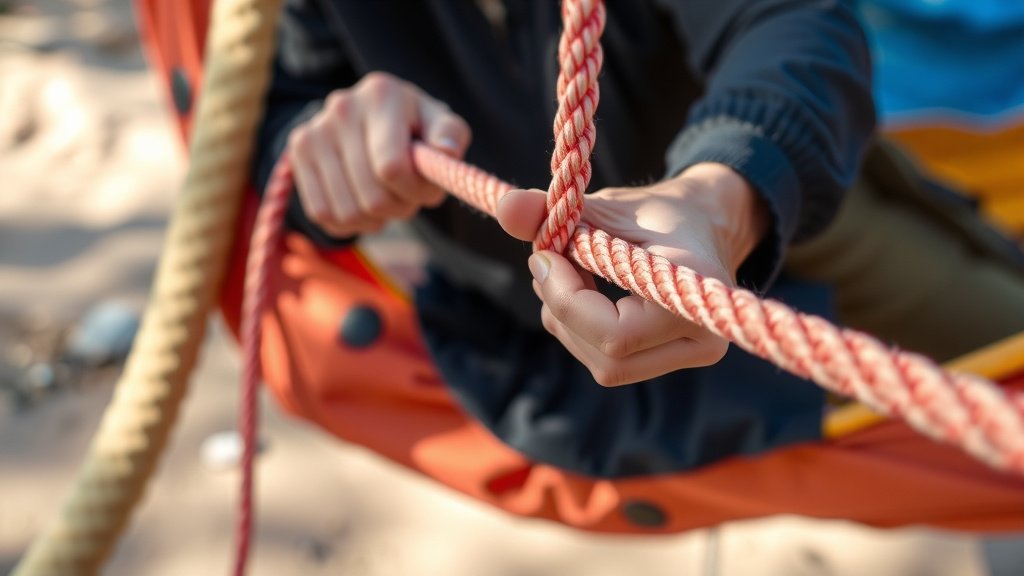
This is where the fid comes in. Take your fid and carefully insert it into the center of the rope, about two or three rope diameters away from the taped end. You want to push it through the rope’s core, separating the strands. Wiggle the fid gently to create a small opening. This opening needs to be large enough to pass one of the rope’s own strands through. Many experts suggest inserting the fid at an angle that allows you to push it forward along the rope’s core, effectively opening up the path.
First Pass: Burying the End
Now, take the very end of your rope (the taped end) and thread it through the opening you just made with the fid. You’re essentially passing the end of the rope back into itself. Pull it through so that the end of the rope is now on the “outside” of the main rope, emerging a few inches away from where you started. This is the first step in burying the end securely. The length of the buried section will depend on your rope diameter and desired loop size; generally, you want at least 6-8 inches of buried end for good security.
Tapering and Further Passes
This is a critical step for a strong splice. You’ve just passed one strand through the core. Now, you need to make subsequent passes with the remaining strands of the rope’s core. However, you can’t just push them all through the same hole. You need to gradually reduce the number of strands you’re passing. For the next strand, you’ll typically pass it over one strand of the sheath and under the next. You continue this pattern, working your way down the rope, passing one strand under each of the main rope’s sheath strands. Some people choose to cut out one or two strands from the rope’s core to make the splice smoother and less bulky. This is called tapering. If you taper, you’ll gradually remove strands with each pass.
Securing the Splice
After you’ve made several passes, the end of the rope should be securely buried within the main rope. Trim off any excess tail that remains. Then, use your lighter to carefully melt and seal the very tip of the trimmed end. This prevents it from fraying. You can also gently flatten this melted tip to make it less noticeable. The goal is to make the splice smooth so it doesn’t snag on anything. Many people also like to “work” the splice by gently bending and massaging it. This helps the strands settle into place and makes the splice tighter and more uniform.
Checking Your Work
Once you’ve finished, inspect your splice carefully. The loop should be smooth and even. The buried end should be well-secured within the main rope. Tug on it firmly to ensure it feels solid. We found that a good splice feels like a single, continuous piece of rope. You can also check the diameter of the spliced section. It should be only slightly thicker than the original rope, especially if you tapered the strands correctly.
Here’s a quick checklist to make sure you’ve got a solid splice:
- Is the loop size correct and consistent?
- Is the buried end at least 6-8 inches long?
- Are all strands passed under the sheath strands correctly?
- Is the splice smooth with no rough edges?
- Does the loop feel strong and secure when tugged?
Conclusion
You’ve now learned the fundamental steps to create a strong, reliable splice for your hammock rope. This skill not only enhances the safety and longevity of your gear but also offers a satisfying sense of accomplishment. By choosing the right rope and using the proper tools, you can achieve a professional-looking and incredibly sturdy loop. Remember, practice makes perfect. So, gather your supplies and give it a try. Your next hammock adventure will feel even more secure thanks to your own two hands.
Frequently Asked Questions
How long should the buried end of my splice be?
For a secure hammock rope splice, we recommend burying the end of the rope for at least 6 to 8 inches. This provides ample material for the strands to lock into place. A longer buried section generally increases the strength and reliability of the splice.
Can I splice any type of rope?
While you can technically splice many ropes, kernmantle ropes are best for hammock applications. These ropes have a core and a sheath, which makes them easier to splice and provides the necessary strength and stretch. Very stiff or tightly woven ropes can be difficult to work with.
What’s the difference between a splice and a knot for hammocks?
A splice creates a permanent loop by weaving the rope’s own strands back into itself. This distributes load evenly and is often stronger and neater than a knot. Knots can create a single weak point and may slip or cause abrasion over time.
How do I prevent my synthetic rope from fraying when I cut it?
For synthetic ropes, the best method is to carefully melt the end with a lighter or heat source until it forms a small ball. This seals the fibers together and prevents unraveling. You can then flatten the melted tip slightly while it’s warm.
My splice looks a bit bulky. How can I make it smoother?
To reduce bulk, you can taper the strands of the rope’s core before making the final passes. This involves gradually removing one or more strands from the core as you work your way down the rope. Properly working and massaging the splice after completion also helps the strands settle and smooth out.