How to Attach a Tarp to Your Hammock
Attaching a tarp to your hammock is surprisingly simple and a fantastic way to add shelter from sun or rain. You can easily create a cozy, protected space by using cordage and a few knots. This setup keeps you dry and comfortable, making your hammock experience much better in various weather conditions.
Beyond just staying dry, a well-attached tarp can also block strong winds and provide much-needed shade on a hot day. Many campers prefer this setup for its versatility and lightweight design. It’s a common practice that many experienced backpackers rely on for comfortable outdoor living.
- Use cordage and knots for secure attachment.
- A tarp offers protection from sun and rain.
- It can also block wind and provide shade.
- This setup is versatile and lightweight.
Ready to learn how to set up your tarp for maximum comfort and protection? Let’s walk through the easy steps together!
Setting Up Your Hammock Tarp for the Best Protection
Attaching a tarp over your hammock is a smart move for comfortable outdoor stays. It’s your personal rain shield and sun blocker. We’ll guide you through the simple steps to get your shelter set up effectively. You’ll be relaxing in your dry, shaded spot in no time.
Choosing the Right Tarp and Cordage
Before you start tying knots, make sure you have the right gear. A good quality tarp is essential. Many backpackers prefer lightweight, waterproof tarps. These come in various shapes, like rectangular, hexagonal, or diamond. The shape can affect how much coverage you get and how easy it is to pitch.
For cordage, strong and durable rope is key. Paracord is a popular choice among campers. It’s strong, lightweight, and versatile. We found that at least 50 feet of cordage is usually sufficient for most setups. This gives you plenty of length for tying off to trees or stakes.
Basic Tarp Setup: The ‘A-Frame’ or ‘Ridge Line’
The most common and straightforward way to hang a tarp over a hammock is using a ridgeline. This method creates a tent-like structure above you.
Step 1: Identify Your Anchor Points
Find two sturdy trees that are far enough apart for your hammock. The distance will also depend on the size of your tarp. Make sure the trees are healthy and strong enough to support the weight. Avoid dead trees or those with visible damage.
Step 2: Attach Your Ridgeline
This is the main line that runs above your hammock. You’ll attach the tarp to this line. First, tie one end of your cordage securely to one tree. A taut-line hitch or a bowline knot works well for this. Then, string the cordage across to the second tree. Pull it taut, but not so tight that it sags excessively. Tie off the second end using the same secure knot.
Step 3: Drape the Tarp Over the Ridgeline
Carefully drape your tarp over the taut ridgeline. Center the tarp so that it hangs evenly on both sides. This ensures equal coverage and protection. If your tarp has grommets or loops along its edges, these will be your attachment points.
Step 4: Secure the Tarp Corners
This is where the magic happens. You need to pull the corners of the tarp outwards and down to create the tent shape. Use additional cordage to tie off the corners. You can tie these to stakes in the ground, roots of trees, or even use smaller trees as anchor points. A taut-line hitch is excellent here too, as it allows you to adjust tension easily.
Step 5: Adjust Tension and Pitch
Once the corners are secured, you’ll want to fine-tune the setup. Gently pull on the guy lines (the cords attached to the corners) to make the tarp taut. A tight tarp sheds water better and looks tidier. Make sure there are no large sags where water can collect. You might need to adjust your knots or re-stake the corners. This can take a little practice.
Alternative Tarp Configurations for Different Needs
While the A-frame is popular, other setups offer different benefits. Sometimes, the trees aren’t perfectly spaced, or you might want extra wind protection.
The Diamond Pitch
This is a simple setup often used for quick shade or light rain. You’ll tie two corners of the tarp to one tree and the other two corners to another tree. This creates a diamond shape over your hammock. It’s quick to set up but offers less side protection than the A-frame.
The Lean-To Pitch
If you need protection from wind blowing from one direction, a lean-to is effective. You’ll tie one side of the tarp high to a ridgeline and stake the other side low to the ground. This creates a slanted roof that deflects wind and rain from a specific direction.
Important Knots for Tarp Setup
Knowing a few reliable knots makes a huge difference. They ensure your shelter stays put, even in windy conditions. Research indicates that using the right knot can significantly improve the stability of your setup.
- Taut-line Hitch: This adjustable knot is perfect for guy lines. You can tighten or loosen it without untying. It’s a go-to for securing tarp corners and keeping your shelter taut.
- Bowline Knot: This creates a fixed loop at the end of a rope. It’s very secure and won’t slip. Use it for attaching your main ridgeline to trees.
- Clove Hitch: A quick and easy knot for temporarily securing cordage. It’s good for attaching to poles or for initial setup before perfecting tension.
Tips for a Waterproof and Stable Setup
Achieving a truly waterproof setup involves more than just hanging a tarp. Attention to detail makes your shelter bombproof.
Angle of the Tarp
Position your tarp so that water runs off easily. A steeper angle helps prevent pooling. Consider the prevailing wind direction too. You want the tarp to shed rain away from your hammock and entrance.
Ground Stakes and Guy Lines
Use sturdy ground stakes. Ensure they are driven deep into the soil at an angle, pointing away from the tarp. This provides maximum holding power. Guy lines should be taut and at a good angle from the tarp edge to the stake. This creates tension and stability.
Seam Sealing and Waterproofing
For maximum protection, especially in heavy rain, check your tarp’s seams. Many seams are factory-taped, but sometimes additional seam sealer can enhance waterproofing. We found that a little extra effort here pays off significantly in wet weather.
Troubleshooting Common Tarp Issues
Even with practice, you might encounter small problems. Here are a few common ones and how to fix them.
- Sagging: If your ridgeline or guy lines are sagging, it means they aren’t taut enough. Re-tie your knots and pull tighter.
- Water Pooling: This is usually due to insufficient angle or tension. Adjust the corners to create a steeper pitch and remove any low spots.
- Wind Noise: A flapping tarp can be annoying. Ensure all edges and corners are securely anchored and taut. Sometimes, adjusting the pitch can also help reduce noise.
Gear Checklist for Your Tarp Setup
Having the right gear makes setup smooth and easy. Here’s a quick list to get you started:
- Hammock
- Tarp
- Ridgeline cordage (approx. 50 ft)
- Guy line cordage (enough for corners/edges)
- Ground stakes (4-6)
- Carabiners or toggles (optional, for easier attachment)
Conclusion
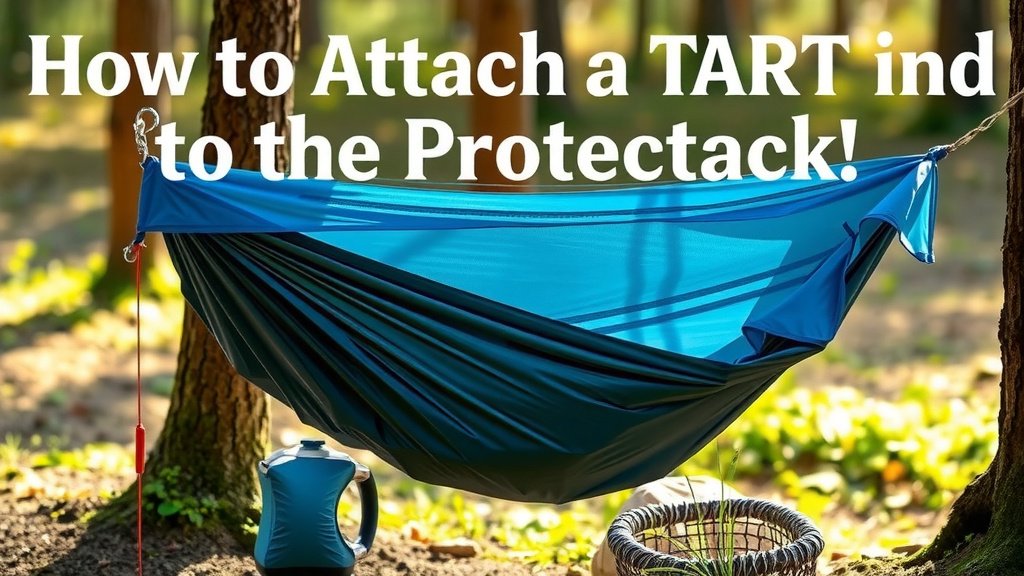
You’ve now learned how to confidently attach a tarp to your hammock, transforming your setup into a versatile shelter. Remember, a well-pitched tarp offers protection from sun, rain, and wind, making your outdoor adventures more comfortable. By mastering a few key knots and understanding proper tensioning, you create a stable and dry haven. Your next step is to practice these techniques. Go out and set up your tarp system before your next trip!
Frequently Asked Questions
How much cordage do I really need for my tarp?
While 50 feet is a good general guideline for your ridgeline, it’s wise to have extra. We found that having an additional 25-50 feet for guy lines gives you flexibility. This ensures you can reach good anchor points, even if they aren’t perfectly positioned.
Can I use my tarp without trees?
Yes, you can! If trees aren’t available, you can use trekking poles or sturdy sticks as support for your ridgeline. You’ll also need to stake out the corners firmly to the ground. This setup requires careful tensioning to remain stable.
What’s the best way to prevent my tarp from flapping in the wind?
A flapping tarp is annoying and can be noisy. The key is to make sure all your anchor points are secure and taut. Double-check your knots and ensure your guy lines are at a good angle to the ground. Adding extra stakes to the edges can also help secure it.
How do I know if my tarp is pitched at the right angle for rain?
You want a noticeable slope so water runs off easily. Look for any areas where water could pool. If you see low spots, adjust your tension and anchor points to create a steeper pitch. Aim for a minimum angle of about 30 degrees if possible.
Do I need a special tarp for hammock camping?
Not necessarily, but lightweight, waterproof tarps are ideal for backpackers. Shapes like hex or diamond tarps are popular because they offer good coverage while being easy to pitch. Make sure it’s large enough to cover your hammock completely.