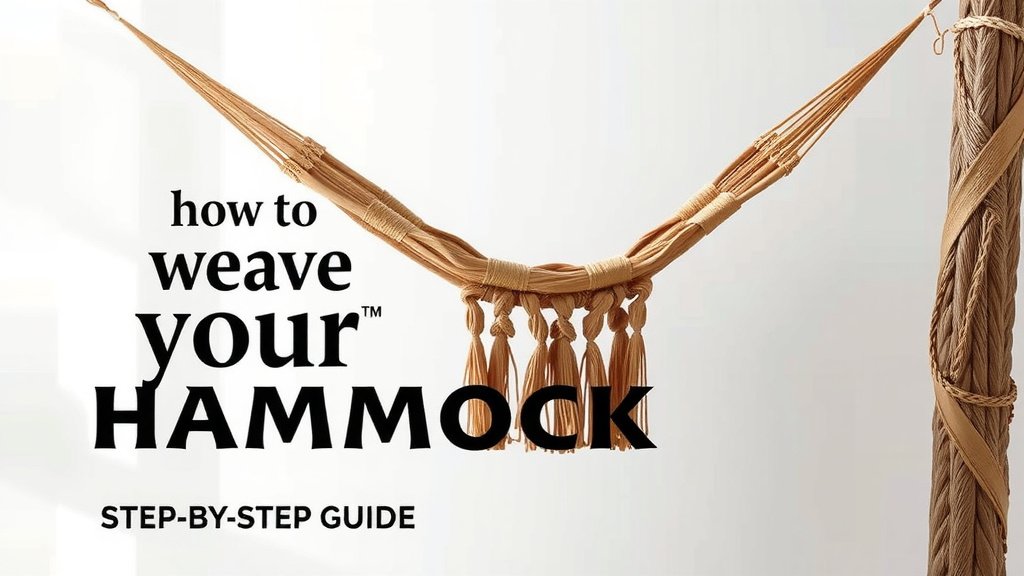
How to Weave Your Own Hammock: A Step-by-Step Guide
Weaving your own hammock is a rewarding DIY project that lets you create a comfortable resting spot. You can absolutely weave a hammock yourself with some patience and the right materials. This guide will show you how to get started with basic weaving techniques.
Creating a hammock by hand is a wonderful way to make something unique and personal. Many crafters find the rhythmic process of weaving quite relaxing. Plus, you get a custom-made hammock for your porch or backyard. It’s a satisfying skill to learn for any DIY enthusiast.
- Gather your rope and tools.
- Learn a few simple knot techniques.
- Understand how to create the hammock bed.
- Finish with strong loops for hanging.
Ready to start? Let’s walk through exactly how to weave your very own hammock, step by step.
“`htmlGetting Started with Your Hammock Weaving Project
Ready to transform a simple length of rope into a comfy hammock? It’s more achievable than you might think! We’re going to break down the process into manageable steps. You’ll learn what materials you need and the basic techniques to get started.
Choosing Your Hammock Rope
The kind of rope you pick makes a big difference. For a sturdy hammock, you’ll want something strong and comfortable to the touch. Many crafters prefer natural fibers like cotton for softness. However, cotton can be susceptible to rot and mildew outdoors. Synthetic ropes like polyester or polypropylene are often more **durable and weather-resistant**. They can handle the elements better. You’ll need quite a bit of rope, so plan accordingly.
How Much Rope Do You Need?
This is a common question! The exact amount depends on the size of your hammock and the weaving pattern. A good rule of thumb is to plan for around 100 to 150 feet of rope per finished hammock. It sounds like a lot, but rope gets used up quickly with knots and weaving.
Essential Tools for Hammock Weaving
You don’t need a fancy workshop. A few basic items will do the trick. You’ll need a way to measure your rope accurately. A good pair of scissors or a sharp knife is essential for cutting. Some people also like to use a measuring tape.
A pair of sturdy gloves can also be a lifesaver. Working with rope for hours can chafe your hands. Research from occupational safety sites often points to using proper hand protection to prevent skin irritation and blisters (Occupational Safety and Health Administration).
Understanding Basic Hammock Knots
Knots are the building blocks of your hammock. Learning a couple of key knots will make the weaving process much smoother. Don’t worry, these aren’t complicated mountaineering knots!
The Lark’s Head Knot (or Cow Hitch)
This knot is fundamental for attaching your ropes to a central support. It’s simple and secure. You’ll essentially be folding your rope in half and passing the loop through itself. Many beginner guides show this knot first. It creates a neat loop that won’t slip.
The Square Knot (or Reef Knot)
The square knot is what you’ll use most for joining sections of rope or creating the woven fabric. It’s straightforward: right over left, then left over right. It’s important to pull it snug. A properly tied square knot is strong. Be sure to practice it until it feels natural. Many people find that practicing on a scrap piece of rope first helps immensely.
The Gathering Knot (or Constrictor Knot)
This knot is vital for the ends of your hammock. It cinches the ropes together tightly to form a strong loop for hanging. You’ll wrap the rope around itself multiple times in a specific way. This prevents the individual strands from fraying or coming undone. We found that using a sturdy rope makes this knot even more secure.
Creating the Hammock Bed: Your Weaving Pattern
Now for the fun part – weaving the actual hammock bed! This is where your hammock takes shape. The most common and accessible method for beginners is a simple netted pattern.
Setting Up Your Workspace
Find a comfortable place to work. You might want to hang your starting point from a hook or a sturdy chair. Some people use a PVC pipe frame. It helps keep the work at a consistent tension. Having enough space to stretch out the ropes is important. You don’t want to feel cramped.
Starting the Weave
You’ll typically start by attaching your main support ropes to your anchor points. Then, you begin threading the weaving ropes. Think of it like knitting or crochet, but with knots. You’ll be working row by row, or round by round, depending on your pattern. For a basic net, you’ll use the square knot to connect ropes.
We found that spacing your knots evenly is key for a consistent look. Aim for about an inch between each knot along the row. This creates a nice, uniform mesh. If your knots are too close or too far apart, the hammock might look uneven.
Working with Multiple Ropes
As you weave, you’ll be managing many strands of rope at once. It can seem daunting at first! Try to keep your unused ropes organized. Tucking them neatly can prevent tangles. Many crafters find it helpful to work on a section of about 10-15 ropes at a time. This makes the process less overwhelming.
Maintaining Even Tension
Consistent tension is another secret to a great-looking hammock. If some parts are much tighter than others, it will look lumpy. Try to pull each knot with similar force. This takes practice, so don’t get discouraged if your first few rows aren’t perfect. You’ll get a feel for it.
Finishing Your Hammock: Hanging Loops
The final step is creating strong loops at each end for hanging. This is where your gathering knot comes in handy. You’ll bring all the woven ropes together.
Forming the End Loops
Gather all the woven cords at one end. You’ll use your gathering knot to create a thick, secure bundle. This bundle then forms the eyelet where you’ll attach your carabiners or hanging hardware. Ensure this knot is **extremely tight and secure**. You don’t want your hammock to fail while you’re enjoying it!
Adding Reinforcement (Optional but Recommended)
For extra security, you can add a few extra wraps around the gathered end before tying the final knot. Some people even weave a separate piece of rope around the gathered section. This adds another layer of protection against wear and tear. Safety guidelines often suggest reinforcing high-stress points on DIY projects like this (Consumer Product Safety Commission).
You’ve done it! With a bit of patience and these steps, you’ve woven your very own hammock. Now all that’s left is to find the perfect spot to hang it and relax.
“`Conclusion
You’ve successfully navigated the steps to weave your very own hammock! From choosing the right rope to mastering essential knots and creating the woven bed, you’ve built something truly special. Remember, patience and consistent tension are your best friends throughout this process. The most rewarding part is seeing your creation come to life. Now, find the perfect spot between two sturdy trees, hang your hammock, and enjoy the fruits of your labor. Your custom-made relaxation station awaits!
Frequently Asked Questions
How long does it take to weave a hammock?
The time it takes can vary widely. For beginners, expect to spend anywhere from 10 to 20 hours on your first hammock. Experienced weavers might complete one in less than 10 hours. It really depends on your speed and the complexity of your chosen pattern.
Can I use regular clothesline for my hammock?
While clothesline might seem like a readily available option, it’s generally not recommended for hammock weaving. Clothesline often lacks the necessary strength, durability, and comfort for supporting body weight. Opting for specialized hammock rope will ensure a much safer and more comfortable outcome.
What if my hammock weaving looks uneven?
An uneven weave is common for beginners! The key is maintaining consistent knot tension. Try to pull each knot with similar force as you go. If sections look too loose or too tight, you can sometimes gently adjust them before moving on. Don’t be afraid to undo a few knots and re-tie them for a better look.
How do I make my hammock more comfortable?
Comfort comes from both the material and the weave. Using a softer rope, like a braided cotton or a treated polyester blend, can make a big difference. Ensuring your knots are spaced evenly and not too tight will create a more yielding and comfortable surface to lie on. A wider hammock also tends to be more comfortable.
Can I wash my homemade hammock?
Most woven hammocks made from synthetic materials like polyester or polypropylene can be spot cleaned with mild soap and water. For natural fibers like cotton, hand washing gently and allowing it to air dry completely is best to prevent mildew. Always check the care instructions for the specific rope you used.