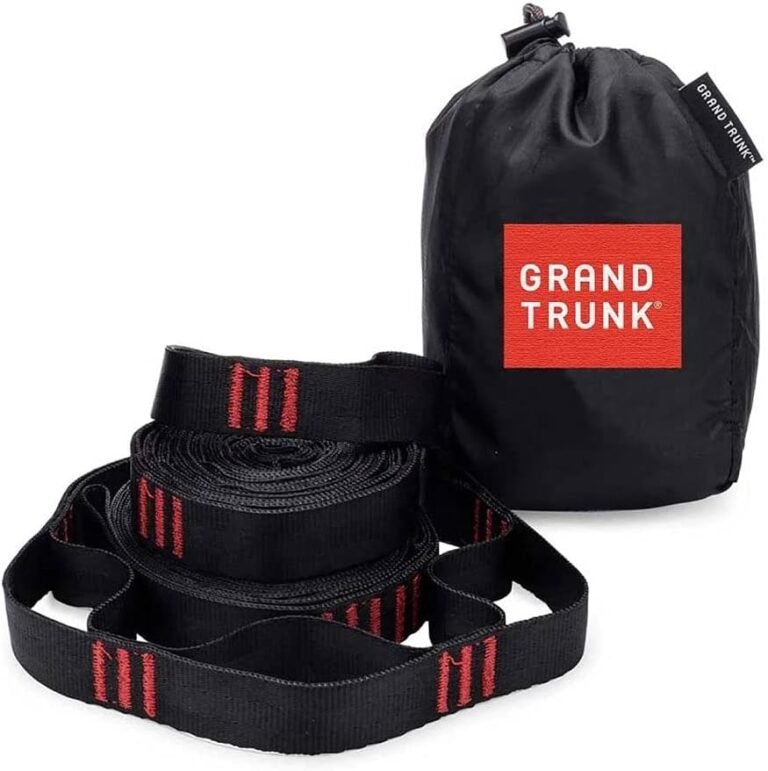
How to Use Hammock Straps: A Step-by-Step Guide
The easiest way to use hammock straps is to wrap the strap around a tree, thread the end through the loop, and pull it tight. Then, clip your hammock’s carabiner to any ring on the strap. You can set up a hammock in under two minutes once you know this simple method. No knots are required, and your tree stays completely safe.
You don’t need to be an outdoor expert to get a perfect hang every time. We found that the key is picking the right tree and adjusting the strap height to match your preference. Whether you are camping, hiking, or just relaxing in your backyard, these straps make setup incredibly simple.
- Wrap the strap around the tree at about eye level.
- Thread the end through the loop and pull it snug.
- Clip your hammock to the connecting ring.
- Adjust the height for the perfect sag (around 30 degrees).
- Check the trees for damage before you start.
Let’s walk through exactly how this works step by step, so you can get hanging without any guesswork.
Mastering the Art of Hanging Your Hammock with Straps
You grabbed your hammock and a fresh set of straps. Now you are standing in the yard wondering where to start. It is easier than you think. We found that a simple two-step process works every time: wrap the strap, then clip the hammock.
This method protects the tree and takes the guesswork out of your setup. Let us break down the whole process so you feel confident before you even touch the fabric.
Why You Should Trust Straps Over Ropes
Ropes and paracord can dig into bark. Over time, this damages the tree and leaves unsightly marks. Straps spread the weight across a wide surface. That means you get a secure hang without harming the environment.
Most modern straps are made from high-tenacity polyester. This material resists stretching and holds up well in wet weather. We found that a standard 1-inch strap is the sweet spot for most recreational hammocks. It offers a good balance of strength and packability. If you’re shopping on a budget, our picks for the best budget hammock straps can help.
Gathering the Right Gear Before You Start
Before you start wrapping, check your gear. You need a hammock, a pair of straps, and two carabiners. Most hammocks come with carabiners already attached. If yours do not, grab a pair rated for at least 300 pounds.
Look at the ends of your straps. You will see a sewn loop on one end and a series of daisy chains or rings on the other. This design is what makes the system so simple. No knots are ever needed.
Step-by-Step Guide to Strap Setup
Here is the exact sequence we recommend for a stress-free setup. Follow these steps in order, and you will have a comfortable hang in no time.
Step 1: Find the Perfect Pair of Trees
Walk around and look for two sturdy, living trees. They should be roughly 12 to 15 feet apart. That spacing gives you the right angle for a comfortable lay. If the trees are closer or farther, you can still make it work, but you might need to adjust the strap height.
Check the bark for damage first. Avoid trees with peeling bark, visible rot, or insect holes. Many state parks have rules about tree protection. Look for signs or ask a ranger if you are unsure. It is always better to ask than to risk a fine or hurt the tree.
Step 2: Wrap the Strap Around the Trunk
Hold the strap by the sewn loop end. Reach around the tree and pull the loose end through that loop. This creates a slip knot that tightens as you pull. It is the same basic motion as tying a lasso, just without the cowboy hat.
Place the strap at about eye level. This height is a great starting point for most people. You can always move it up or down later. Pull the loose end firmly to snug the strap against the bark. Give it a gentle tug to make sure it will not slide down.
Getting the Angle Right
You want the strap to sit flat against the tree. If it is twisted, it creates pressure points and weakens the hold. Run your hand along the strap to smooth out any twists before you pull it tight.
Step 3: Connect Your Hammock to the Strap
Take your hammock’s carabiner and clip it to one of the loops or rings on the strap. You have plenty of options here. The daisy chain system gives you multiple attachment points, usually spaced about one inch apart. Choose the loop that feels right for your height.
Repeat the same process on the second tree. Now you have a hammock that is suspended but not yet perfect. That is okay. The next step is all about fine-tuning.
Step 4: Adjust the Height and Sag
Climb in and sit down gently. Notice how your body feels. If your feet are higher than your head, you need to lower the strap on one side. If you are sitting too upright, raise the straps or move them further up the tree.
We found that a 30-degree angle at the strap is the gold standard. That means the strap slopes down from the tree at about 30 degrees. This gives you a flat, diagonal lay that is comfortable for your back. It also reduces stress on the straps and hardware.
The Finger Test
Here is a quick trick we use all the time. Extend your arm and point at the strap where it meets the tree. If your arm is roughly parallel to the ground, you are close to the right angle. If your arm points up or down sharply, adjust the strap height.
Common Mistakes and How to Avoid Them
Even experienced campers make mistakes. We have seen it all, from straps wrapped too low to trees that were too close together. Here are the most common issues and the quick fixes we recommend.
Mistake 1: Straps Too Low
If you hang the straps at waist level, you will end up sitting on the ground. It is a classic rookie error. Always start at eye level. You can lower the strap later if you need to, but it is much harder to raise a heavy hammock after you are in it.
Mistake 2: Ignoring Tree Health
We get it. You found the perfect spot and just want to relax. But wrapping a strap around a damaged tree is a bad idea. The bark might peel off, or the tree could drop a branch. Always inspect the tree first. It takes ten seconds and protects everyone.
Mistake 3: Forgetting to Check the Hardware
Carabiners wear out over time. Look for cracks, rust, or bent gates before you clip in. A worn carabiner is a safety hazard. If you see any damage, replace it immediately. They are cheap to buy and worth the peace of mind.
Strap Options and What Works Best
Not all straps are created equal. We tested several types and found clear differences in ease of use. Here is a quick comparison to help you choose. For a rundown of top-rated models, see our guide to the best adjustable hammock straps.
| Strap Type | Best For | Ease of Adjustment |
|---|---|---|
| Daisy Chain (Loop) | Backyard lounging | Easy, one-inch increments |
| Whoopie Sling | Ultralight backpacking | Infinite, but takes practice |
| Cam Buckle Strap | Quick setups | Very easy, no threading |
We found that daisy chain straps are the most forgiving for beginners. The loops make it obvious where to clip. Whoopie slings are lighter but require a bit of learning. Cam buckle straps are great if you want the fastest possible setup.
Tips for a Comfortable and Safe Hang
Getting the straps on is only half the battle. The other half is making sure you are comfortable for the long haul. Here are our top tips for a perfect afternoon nap.
- Always sit in the center of the hammock for the flattest lay.
- Angle your body slightly diagonal to the hammock’s centerline.
- Use a tree protector if your straps are narrower than 1.5 inches.
- Check the weather forecast before you hang for a long time.
- Bring a small pillow for neck support during long sessions.
- Test the weight limit before you fully commit to relaxing.
Many experts say that a proper hang should feel like a gentle cradle. Your knees should be slightly bent, and your back should be straight. If you feel pressure on your lower back, you are probably hanging too tight. Loosen the straps a bit and try again.
Quick Checklist Before You Relax
Run through this list one last time before you settle in. It takes less than a minute and saves you from a surprise fall.
- Tree health check: No rot, no peeling bark, no insects.
- Strap is flat: No twists or folds against the bark.
- Slip knot is tight: Give it a firm tug to test.
- Carabiners are closed: The gates are locked and secure.
- Height is right: The 30-degree angle looks correct.
- Weight test: Sit gently before you swing your legs in.
That is all there is to it. You have the knowledge and the gear. Now go find two good trees and enjoy the view from your new favorite spot. Remember, practice makes perfect. The first time might take a few extra minutes, but by your third hang, you will be done in under two minutes flat.
Conclusion
You now have everything you need to hang your hammock safely and comfortably. The whole process comes down to three simple actions: wrap the strap, clip the carabiner, and adjust the height. We found that starting at eye level and aiming for that 30-degree angle solves most setup problems before they start.
Take the extra minute to check your trees and hardware. That small habit keeps you safe and protects the environment. Your first attempt might take a little longer, but that is completely normal. By your third hang, you will move through the steps without even thinking about them.
Grab your straps, find two good trees, and give it a try this weekend. You will be relaxing in your new favorite spot before you know it.
Frequently Asked Questions
How tight should hammock straps be around a tree?
You want the strap snug against the bark, but not cranked down with all your strength. Pull it firm enough that it will not slide down the trunk when you sit. If you can wiggle the strap easily with one hand, tighten it a bit more. The slip knot holds better when the strap sits flush against the tree.
Can I leave hammock straps on trees overnight?
We recommend taking them down when you are done for the day. Even wide straps can leave marks on sensitive bark if left under tension for hours. It also keeps your gear safe from weather and wildlife. Removing straps takes less than a minute and keeps the trees healthy for future hangs.
What is the maximum distance between trees for hammock straps?
Most standard hammock straps reach about 10 to 15 feet per side. That means trees should be roughly 12 to 18 feet apart for a comfortable hang. If your trees are farther apart, you might run out of strap before you find the right angle. Closer trees are easier to work with because you can always raise the straps higher.
Do hammock straps stretch over time?
Quality polyester straps resist stretching, but cheap nylon ones can sag after repeated use. You can test yours by hanging your hammock and sitting down gently. If you sink lower than expected, your straps may have stretched out. Replacing worn straps is worth the cost for your safety and comfort.
Can I use hammock straps on posts or poles instead of trees?
Yes, you can use straps on sturdy wooden or metal posts, but check the diameter first. The post should be at least six inches thick to hold the strap securely. Avoid posts with sharp edges or rust that could cut the strap material. Always give the strap a firm tug before you sit down to make sure the post can handle the load.