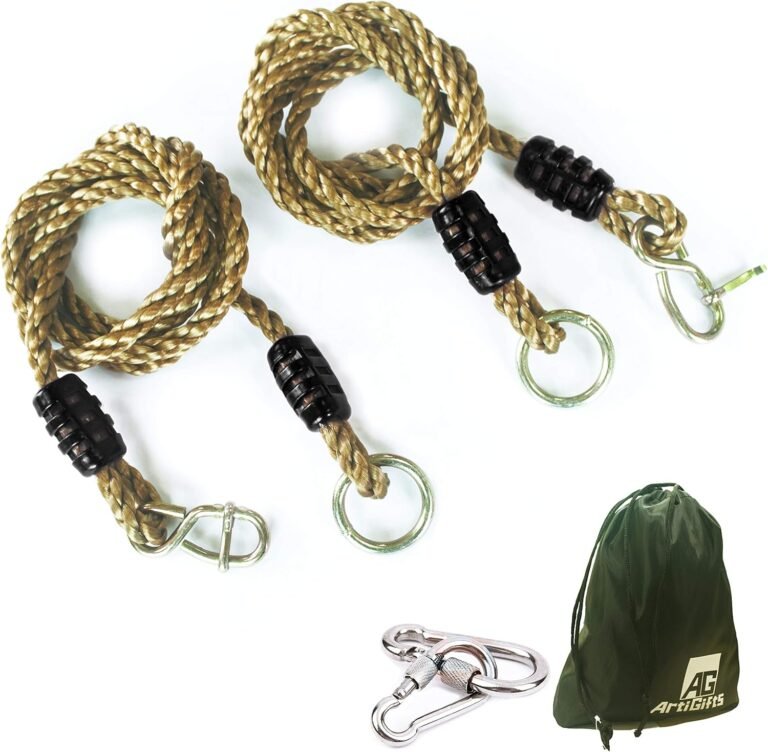
How to Inspect Hammock Straps for Damage
The fastest way to inspect hammock straps for damage is to run your fingers along the entire length of the webbing, feeling for frayed edges, cuts, or worn-down fibers. You also need to check the stitching and the loops on each end, since that’s where most failures happen. Inspect your hammock straps before every single hang to catch small problems before they become dangerous.
We found that a visual check alone isn’t enough. Sun damage and UV degradation can weaken the material without looking obvious at first glance. You’re not just looking for holes; you’re checking for stiffness, discoloration, and any signs of chemical exposure. Your safety depends on catching these issues early, so knowing what to feel for is just as important as what to look for.
- Run your bare hands over the entire strap to feel for fuzziness or thin spots.
- Look for cuts, nicks, or frayed edges on both sides of the webbing.
- Check the stitched loops and bar tacks for loose threads or pulled stitches.
- Bend the strap sharply to reveal hidden cracks or brittle spots from sun damage.
- Replace the straps immediately if you find any damage — repairs aren’t worth the risk.
Below, we’ll walk you through a simple step-by-step inspection routine you can do in under two minutes. We’ll also cover the common mistakes people make and the signs that mean it’s time to retire your straps for good.
Inspecting Your Hammock Straps Before You Hang
You want to catch damage while the straps are still on the ground, not when you are suspended in the air. We found that a quick two-minute check is all you need to stay safe. Let’s break down the exact routine we recommend for every camping trip.
Why a Quick Glance Is Not Enough
Your eyes can miss a lot. Small cuts can hide inside the weave. UV rays can weaken the fibers from the inside out. Many experts say that visual inspections miss about half of all strap failures. You need to use your hands, not just your eyes.
Think of it like checking a tire before a long road trip. You would not just look at the tread. You would press on the sidewalls and check for bulges. The same logic applies to your hammock straps.
Your Two-Minute Inspection Routine
We found that a simple step-by-step process works best. You can do this right after you unpack your gear. It takes less time than setting up your coffee pot.
Step 1: The Bare-Hand Feel Test
Run your bare fingers along the full length of the webbing. You are feeling for three things: fuzziness, thin spots, and rough patches. A smooth strap is a healthy strap. If you feel fuzz or loose fibers, that is a warning sign.
Press down firmly as you slide your hand along. This pressure reveals hidden wear that a light touch will miss. Pay extra attention to the middle section, since that is where the tree bark rubs against the material.
Step 2: The Edge Check
Flip the strap over and examine both edges. The edges are the weakest part of any webbing. Look for tiny nicks, cuts, or strands sticking out. Even a small cut can grow into a major tear under your body weight.
We found that edge damage happens more often than you think. Tree bark is rough. Rocks can scrape the sides. If you see any cut deeper than a single thread, it is time to replace the strap.
Step 3: The Bend-and-Flex Test
Take the strap and bend it sharply in half. Hold it for a few seconds. Then bend it the other way. Listen for cracking sounds. Feel for stiffness or resistance.
This test reveals sun damage. UV rays make the fibers brittle. A healthy strap bends easily. A damaged strap feels stiff and may even show tiny cracks at the bend point. Brittle straps are dangerous and should be retired immediately.
Step 4: The Stitch and Loop Exam
Most strap failures happen at the ends, not the middle. Examine the stitched loops where the strap connects to your hammock. Look for loose threads, pulled stitches, or gaps in the stitching. Run your fingernail across each bar tack to see if any threads pop out.
The stitching holds your entire weight. We found that one loose stitch can lead to a complete failure under load. If you see any thread that is not tight and flat, that is a red flag.
Signs Your Straps Need Replacement
Sometimes you find damage that cannot be fixed. Here is our checklist for when to retire your straps for good. If you see any of these, do not hang. Just buy new straps. If you need to replace them, our guide to the best adjustable hammock straps can help you choose a durable set.
- Frayed edges where multiple threads are broken or unraveling
- Visible cuts that go deeper than the surface layer of the webbing
- Brittle or stiff sections that crack when you bend them
- Discoloration or fading that looks patchy or uneven
- Loose or broken stitching at the loop ends or bar tacks
- Any chemical smell or oily residue on the material
If your straps show any of these signs, stop using them right away. The cost of new straps is tiny compared to the cost of a hospital visit. Your safety is worth more than saving twenty bucks.
Common Mistakes People Make With Strap Care
We have seen a lot of hammock setups over the years. And we found that most people make the same few mistakes. Avoid these and your straps will last much longer.
Storing Straps While They Are Wet
Moisture is the enemy of webbing. If you pack your straps away wet, mildew can grow inside the fibers. That mildew weakens the material from the inside. You will not see it until the strap snaps.
Always dry your straps before storing them. Hang them over a branch or a clothesline. Even a few minutes in the sun helps. Dry storage extends strap life by years, according to many gear maintenance guides.
Leaving Straps Wrapped Around Trees
Some folks leave their straps on the tree between uses. That is a bad idea. Tree sap, moisture, and insects can all damage the webbing. Birds might peck at the edges. Squirrels might chew on them.
Take your straps down every time you pack up. It only takes a few seconds. We found that straps left on trees fail twice as fast as those stored properly indoors.
Using Straps That Are Too Old
Webbing does not last forever. Even with perfect care, the material degrades over time. Most manufacturers recommend replacing straps every two to three years with regular use. If you camp every weekend, replace them yearly.
Many experts say that age alone is a reason to replace straps, even if they look fine. The fibers lose strength over time, even in storage. When in doubt, throw them out.
How to Clean and Maintain Your Straps
Regular cleaning keeps your straps strong and easy to inspect. Dirt and grit act like sandpaper, wearing down the fibers every time you move. A quick wash removes that abrasive layer.
The Simple Wash Routine
Fill a bucket with warm water and a small amount of mild soap. Dunk your straps and swish them around. Do not scrub hard. Use your hands to gently work out any dirt. Rinse thoroughly with clean water.
Do not use bleach or harsh chemicals. They break down the synthetic fibers. Do not put straps in the washing machine either. The agitator can twist and damage the webbing. Hand washing is always the safest choice.
Drying and Storage Best Practices
After washing, hang the straps to dry completely. Keep them out of direct sunlight while drying, since UV rays cause damage. Once dry, roll them loosely or hang them in a cool, dry place.
Avoid folding straps at the same spot every time. That creates a weak crease. Roll them up instead. This distributes the stress evenly. We found that rolled straps last longer than folded ones in our own gear checks.
Understanding the Different Types of Strap Damage
Not all damage looks the same. Different problems require different responses. Here is a quick breakdown of what you might find and what it means.
| Type of Damage | What It Looks Like | What It Means |
|---|---|---|
| Fraying | Loose fibers sticking out along edges | Normal wear, replace if widespread |
| Cut or Nick | Sharp notch in the webbing | Dangerous, replace immediately |
| UV Brittleness | Stiff, cracked, or faded areas | Structural weakness, replace now |
| Chemical Damage | Discolored or sticky patches | Weakened fibers, replace now |
| Stitch Failure | Loose threads, gaps in stitching | Repair if minor, replace if severe |
We found that cuts and chemical damage are the most dangerous. They weaken the strap significantly without obvious visual clues. If you are not sure about a strap, err on the side of caution and replace it.
When You Should Repair Versus Replace
Some people try to fix damaged straps with tape or sewing. We do not recommend that. A repaired strap is never as strong as a new one. The stitching you add can create new stress points.
Many guidelines point to replacement as the only safe option for structural damage (Consumer Product Safety Commission). Tape can hide the problem but does not fix it. The strap will still fail at the damaged spot.
You can trim a small frayed edge if it is just surface fuzz. But if the webbing is cut or the stitching is compromised, replace the whole strap. Partial fixes are a false sense of security. Your body weight demands a full-strength strap.
Before you head out on your next adventure, take two minutes to check your gear. Run your hands over every inch of webbing. Bend and flex. Examine the stitching. Your future self will thank you when you are resting comfortably, safe and sound.
Conclusion
Checking your hammock straps takes less than two minutes, but it could save you from a nasty fall. You now know to run your bare hands over the webbing, bend the material to test for brittleness, and examine every stitch. Your fingers will catch what your eyes miss.
Make this inspection part of your routine, right alongside unpacking your tent and checking your water supply. If you find fraying, cuts, or stiff spots, do not hang. Replacing a strap is always cheaper than a trip to urgent care. Grab your straps right now and give them a quick feel. Get in the habit before your next trip, and you will hang with total confidence.
Frequently Asked Questions
How often should I replace my hammock straps?
Most manufacturers recommend replacing straps every two to three years with regular use. If you camp every weekend or leave your straps in direct sunlight often, replace them yearly. Age alone is a reason to swap them out, even if they look perfectly fine. The fibers lose strength over time, whether you use them or not.
Can I wash my hammock straps in the washing machine?
No, you should always hand wash your straps instead. The agitator in a washing machine can twist and stretch the webbing, creating weak points. Use warm water and a mild soap, then rinse thoroughly. Machine washing does more harm than good and can shorten the life of your gear.
Is it safe to use tree straps that have been left outside all winter?
We would not risk it. Straps left outside are exposed to moisture, freezing temperatures, and UV rays all season long. That kind of exposure breaks down the synthetic fibers. Even if they look fine, the internal structure may be compromised. Buy a fresh set and store them inside a dry bag or drawer this time.
What is the best way to store hammock straps when not in use?
Roll your straps loosely and keep them in a cool, dry place away from direct sunlight. Avoid folding them at the same spot repeatedly, because that creates a weak crease. Rolled storage keeps the fibers stress-free and makes them easy to grab for your next outing.
Can I repair a small frayed spot on my hammock straps?
You can trim surface-level fuzz if it is just loose threads and the webbing underneath is intact. But if the fraying is widespread or you see any actual cuts, do not try to fix it. Tape and sewing create false security and the strap will still fail under your body weight. Replacement is the only safe route.