How a Hammock Ridgeline Works: Your Guide
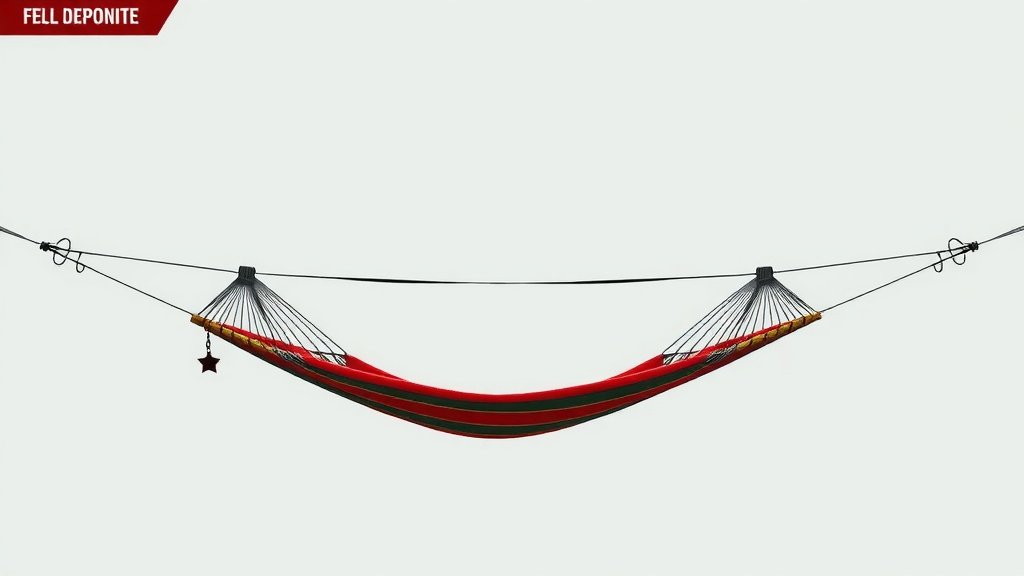
A hammock ridgeline works by creating a consistent sag between two anchor points, giving your hammock a predictable shape and preventing it from feeling too tight or too loose. This simple cord acts as a guide, ensuring your hammock hangs at the perfect angle every time. It’s a game-changer for comfort and setting up your hang.
When you set up your hammock, the ridgeline is the key to a truly comfortable experience. It helps you achieve that ideal banana-like curve, which is essential for a good night’s sleep in the backcountry. Many seasoned campers swear by their ridgeline for consistent and enjoyable hangs, turning a potentially lumpy nap into a cloud-like rest.
- A ridgeline is a cord tied between hammock suspension points.
- It dictates your hammock’s sag for consistent comfort.
- It helps create the perfect “banana” shape for sleeping.
- This setup makes hanging your hammock much easier.
Let’s dive into exactly how this clever piece of string makes all the difference and how you can set one up for your next adventure.
“`htmlUnderstanding Your Hammock Ridgeline
So, how exactly does that simple cord make such a big difference? Your hammock ridgeline is essentially a fixed-length cord strung between your hammock’s suspension points. It’s not meant to hold your weight, but rather to act as a guide. It ensures your hammock always sags to a specific, comfortable length. Think of it as a ruler for your hammock.
Many hammock campers find that without a ridgeline, their hammock can feel like a tight guitar string one day and a baggy hammock chair the next. This inconsistency can lead to uncomfortable hangs, especially if you’re trying to get a good night’s sleep. A ridgeline helps you avoid this unpredictability.
The Science Behind the Sag
The perfect hammock hang isn’t just about being suspended; it’s about achieving the right amount of sag. Experts often recommend a sag of around 25-30% of the total suspension length. For example, if your suspension is 10 feet long, you’re looking for about 2.5 to 3 feet of sag in the middle (National Park Service).
A ridgeline helps you hit this sweet spot consistently. By setting your ridgeline to the correct length, your hammock will naturally pull into that ideal “banana” shape when you lie in it. This shape distributes your weight evenly, preventing pressure points and making for a much more comfortable experience.
How it Prevents the “Death Triangle”
Ever felt like you’re being squeezed by your hammock? That’s often because the ends are pulled too tight, creating a steep angle. This is sometimes called the “death triangle” because it can be very uncomfortable, forcing you into an awkward position. Your ridgeline prevents this by limiting how far the ends can be pulled in.
It keeps the tension distributed along the entire length of the hammock. This means you get a gentle, even curve, rather than a sharp bend. The result is a more spacious and relaxing feel inside your hammock.
Setting Up Your Ridgeline: The Essentials
Getting a ridgeline set up is surprisingly straightforward. You’ll need a few key items to make it happen. Don’t worry, it’s not complicated!
What You’ll Need
You don’t need much to get started. The most important component is, of course, the ridgeline cord itself. Many hammock manufacturers include one, but you can also buy it separately.
- Ridgeline Cord: This is typically a strong, lightweight cord like paracord or a specialized synthetic line. The length will depend on your hammock and suspension system.
- Hardware (Optional but Recommended): Some people use small carabiners or toggles to attach the ridgeline to their hammock suspension. Others tie it directly.
- Trekking Poles or Sticks (For Pitching a Tarp): If you plan to use a tarp over your hammock, these can help pitch the ridgeline tautly for rain and sun protection.
Choosing the Right Length
This is where the magic happens. The length of your ridgeline is critical. A good rule of thumb is to set your ridgeline length so that when it’s pulled taut between your anchor points, your hammock has the desired sag when you get in it. Many hammock manufacturers provide recommended ridgeline lengths for their specific hammocks.
If you’re unsure, a common starting point is a ridgeline that’s about 83% of the length of your hammock. For instance, a 10-foot hammock might do well with an 8.3-foot ridgeline. However, personal preference plays a big role. You might experiment to find what feels best for your body and your hammock.
The “83% Rule” Explained
This guideline comes from a lot of testing and experience by hammock campers. It’s designed to provide that ideal sag for most people and most hammocks. It helps create a consistent, comfortable hang that prevents the hammock from becoming too loose or too taut. Research suggests this ratio offers a good balance of comfort and stability (Backpacking Light).
Attaching Your Ridgeline
There are a couple of common ways to attach your ridgeline. The goal is to have it securely connected to the same points your hammock suspension attaches to. This ensures it guides the hammock’s shape correctly.
- Direct Tie-Off: You can tie the ridgeline directly to your hammock suspension hardware (like whoopie slings or cinch straps). Use a secure knot like a bowline or a taut-line hitch.
- Toggles or Carabiners: Many campers prefer to use small carabiners or toggles. The ridgeline has loops, and these loops attach to the carabiners, which then attach to your suspension. This makes setup and takedown quicker.

Why a Tarp Ridgeline is Your Best Friend
While a ridgeline is fantastic for your hammock’s comfort, it’s absolutely essential when you’re using a tarp for shelter. This is where it really shines. A well-pitched tarp can save you from a miserable night in the rain.
Keeping Dry and Comfortable
Your tarp ridgeline runs above your hammock, creating a peak. This peak is essential for shedding rain and snow away from your sleeping area. Without a taut ridgeline, your tarp can sag in the middle, collecting water like a leaky bucket.
A taut tarp ridgeline ensures that water runs off effectively. It also keeps the tarp fabric pulled tight, preventing flapping in the wind and creating a more stable, quiet shelter. It’s the difference between a cozy haven and a damp, windy ordeal.
Pitching Your Tarp with a Ridgeline
Setting up a tarp with a ridgeline is often much simpler than you might imagine. You usually attach the ridgeline between two trees, at a height that suits your needs. Then, you drape your tarp over this ridgeline and stake out the corners and edges.
The tension you put on the tarp ridgeline dictates how taut the tarp itself will be. You can adjust this tension to keep it snug against wind and rain. Many people use adjustable guylines to fine-tune the tarp’s pitch. This whole system works together to give you a reliable shelter.
Here’s a quick checklist for your ridgeline setup:
- Ensure your ridgeline cord is strong and the right length.
- Attach it securely to your hammock suspension points.
- Check the sag when you first get in.
- For tarps, ensure it’s taut to shed water.
- Adjust as needed for your comfort and weather conditions.
Conclusion
You’ve seen how a simple cord can transform your hammock experience. Your ridgeline ensures a consistent, comfortable sag every time you hang, preventing those too-tight or too-loose setups. It’s your secret to achieving that perfect “banana” shape for restful sleep and avoiding the uncomfortable “death triangle.” Plus, it’s your best friend for pitching a reliable tarp shelter. Don’t let another hang be unpredictable. For your next trip, set up your ridgeline and feel the difference a predictable hang makes.
Frequently Asked Questions
What happens if my ridgeline is too long?
If your ridgeline is too long, your hammock will likely feel too loose. You might find yourself sinking too deeply, and it can be harder to get in and out of the hammock comfortably. You’ll want to shorten it to achieve that ideal sag.
Can I use regular rope for my ridgeline?
While you can use regular rope like paracord, specialized ridgeline cords are often preferred. These are typically lighter, stronger, and have less stretch, offering more consistent performance and less weight in your pack.
Do I need a ridgeline if I’m just lounging for a short time?
Even for short lounging sessions, a ridgeline can improve comfort. It helps prevent your hammock from becoming too tight or too saggy, making your relaxation time more enjoyable. It also makes getting out of the hammock much easier.
How do I know what the “ideal sag” feels like?
The ideal sag often feels like a gentle curve, similar to a banana. When you lie in it, your weight should be evenly distributed without feeling like you’re being squeezed or are too far down. Experimenting with slight adjustments will help you find your personal sweet spot.
Is a ridgeline necessary for my hammock to be safe?
Your hammock’s suspension system is what holds your weight, not the ridgeline. The ridgeline’s primary purpose is comfort and consistency. While it ensures a better hang, it doesn’t directly contribute to the structural safety of holding your weight.